Overview
This guide walks through reserving and launching Capacity Blocks for ML.
Note: The purchase of Capacity Blocks for ML is blocked by default for NAIRR researchers.
Before deciding to use Capacity Blocks for ML, please try Spot Instances first. Spot Instances are more cost-effective and flexible, though availability depends on demand. You can learn more about launching Spot Instances here: https://community.cloudbank.org/t/launching-a-spot-instance-vm-on-aws-ec2/218.
If you would like to enable Capacity Blocks for your project, please review this guide, email help@cloudbank.org, and provide a brief justification on why your project requires them, the number of capacity blocks you plan to purchase, and the estimated cost.
AWS Capacity Blocks for ML provides the ability to reserve high-performance EC2 GPU instances for a specified future date and duration, giving users more control over resource planning, especially during periods of peak demand. This ensures high availability of resources, even when demand increases.
When to use Capacity Blocks:
- You need access to the latest GPUs for 1 or more days
- Your research has firm deadlines
- Capacity shortage would seriously impact your timeline
- You are training large models (>1B parameters)
- Your budget allows guaranteed capacity premium
When not to use Capacity Blocks:
- You are doing exploratory research with uncertain requirements
- You are developing or code testing
- You have budget-constrained projects prioritizing cost
- You only need short bursts (< 24 hours) of GPUs
- You have experimental code that might not work
Capacity Blocks for ML uses fixed upfront pricing for the reservation period, regardless of the actual usage or market demand fluctuations. The payment is made at the time of reservation to the AWS account and will be charged as a credit to your CloudBank funds. If you choose a Platform other than Linux/UNIX, there will be a separate charge for the operating system license that will be charged when the instances are launched during the reservation period. Capacity block and platform pricing is available at https://aws.amazon.com/ec2/capacityblocks/pricing/.
Once a Capacity Block reservation is made, the reservation can only be extended by adding additional days to the reservation. All other details cannot be modified and the reservation cannot be canceled. Users should carefully review their requirements before committing to the reservation.
To note, Capacity Blocks for ML is a specific type of AWS Capacity Reservation. It differs from On-Demand Capacity Reservations, which are used to reserve general compute instances. On-Demand offers more reservation flexibility with allowed modifications and cancellations.
Recommended Booking Prerequisites (1-8 weeks prior):
- Estimate GPU-hour requirements (convert this to # of EC2 instances hrs.)
- Prepare and stage datasets in AWS
- Test code on smaller Spot/On-Demand instances
- Create optimized AMIs with dependencies
- Set up EC2 launch templates, monitoring and auto-save
Now you’re ready
- Book your Capacity Block reservations and use the launch template to create your instance at a scheduled time.
Purchasing a Capacity Block
The below guides you through the process of purchasing a Capacity Block. For additional information, please refer to AWS User Guide for Capacity Blocks.
First, ensure the AWS Console is set to the desired region and Availability Zone as the Capacity Reservations will automatically inherit the same zone and cannot be changed.

Then go to the EC2 dashboard and select Capacity Reservations on the left navigation.

If this is your first time, you will see a welcome message; select Purchase Capacity Blocks for ML and Get started.
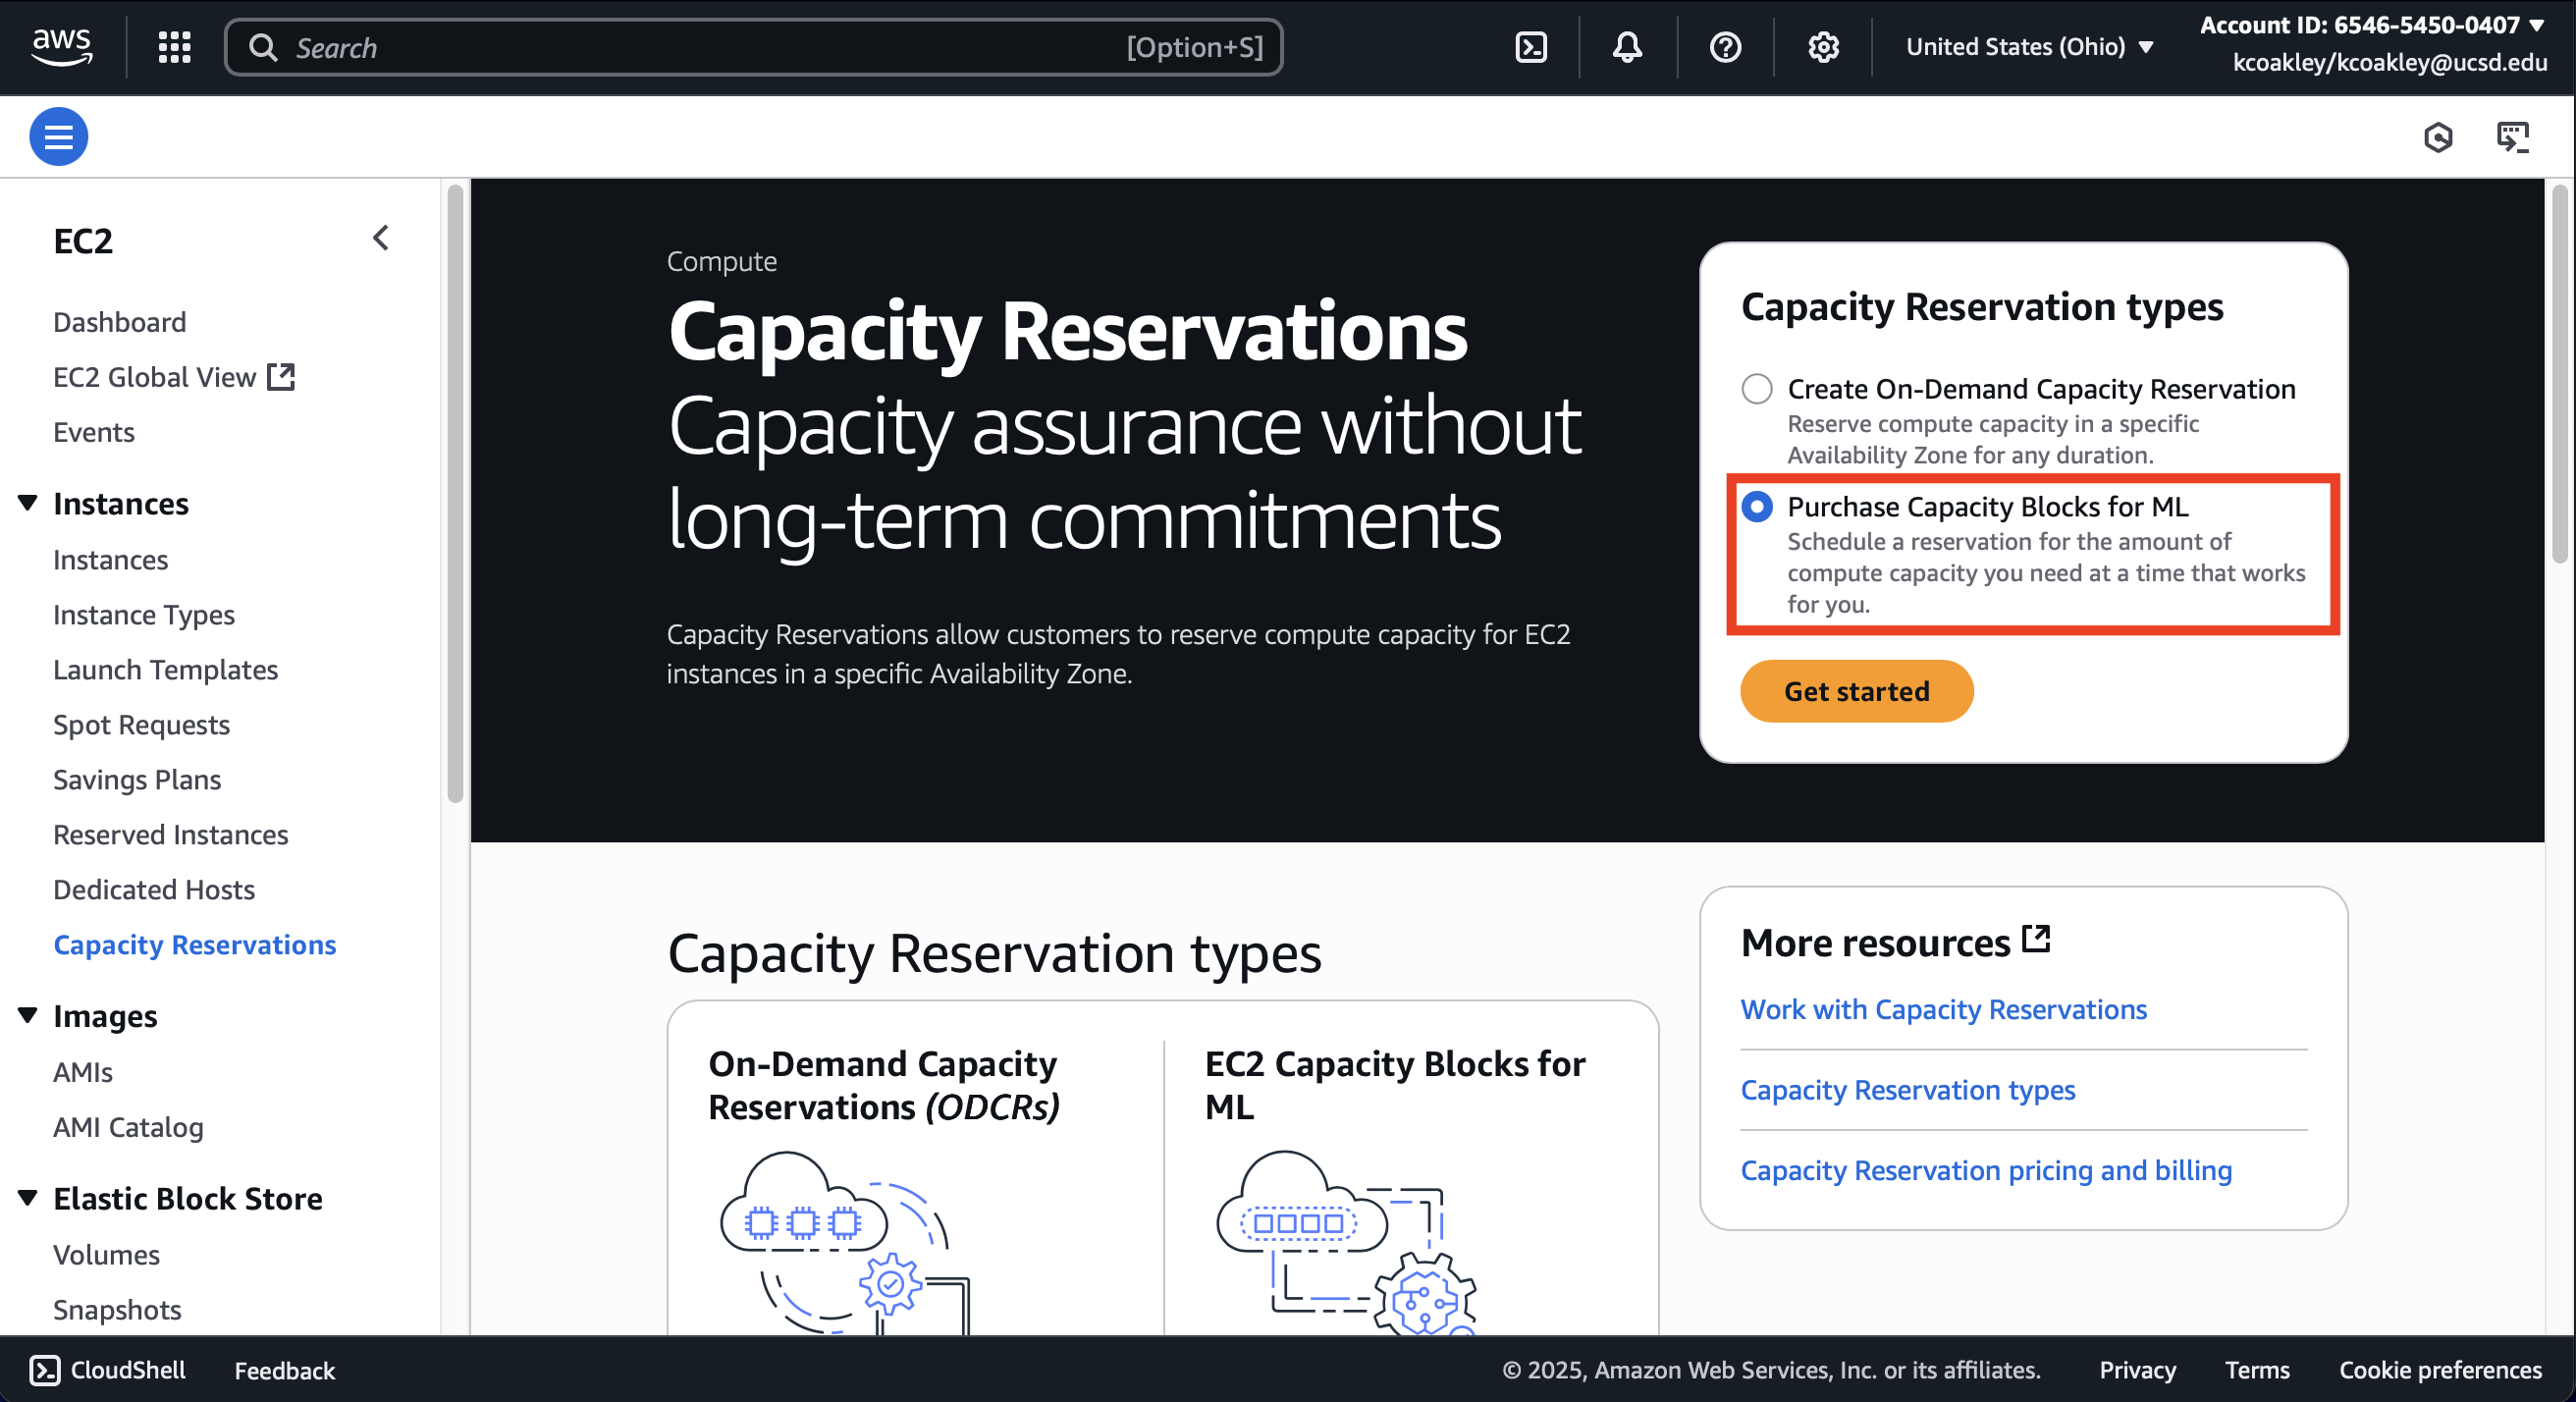
Otherwise, if you have used Capacity Reservations before, you will see the Capacity Reservation list. Select the Create Capacity Reservations button.

Then the page will display the Capacity Reservation options and descriptions. Under “Capacity Blocks for ML”, select Create.

Select the Instance Type, Platform, Total capacity (between 1 and 64 instances) and Durations (the duration must be 1-14 days, 21 days, 28 days, or multiples of 7 up to 182 days). These options cannot be modified once the Capacity Block has been reserved.
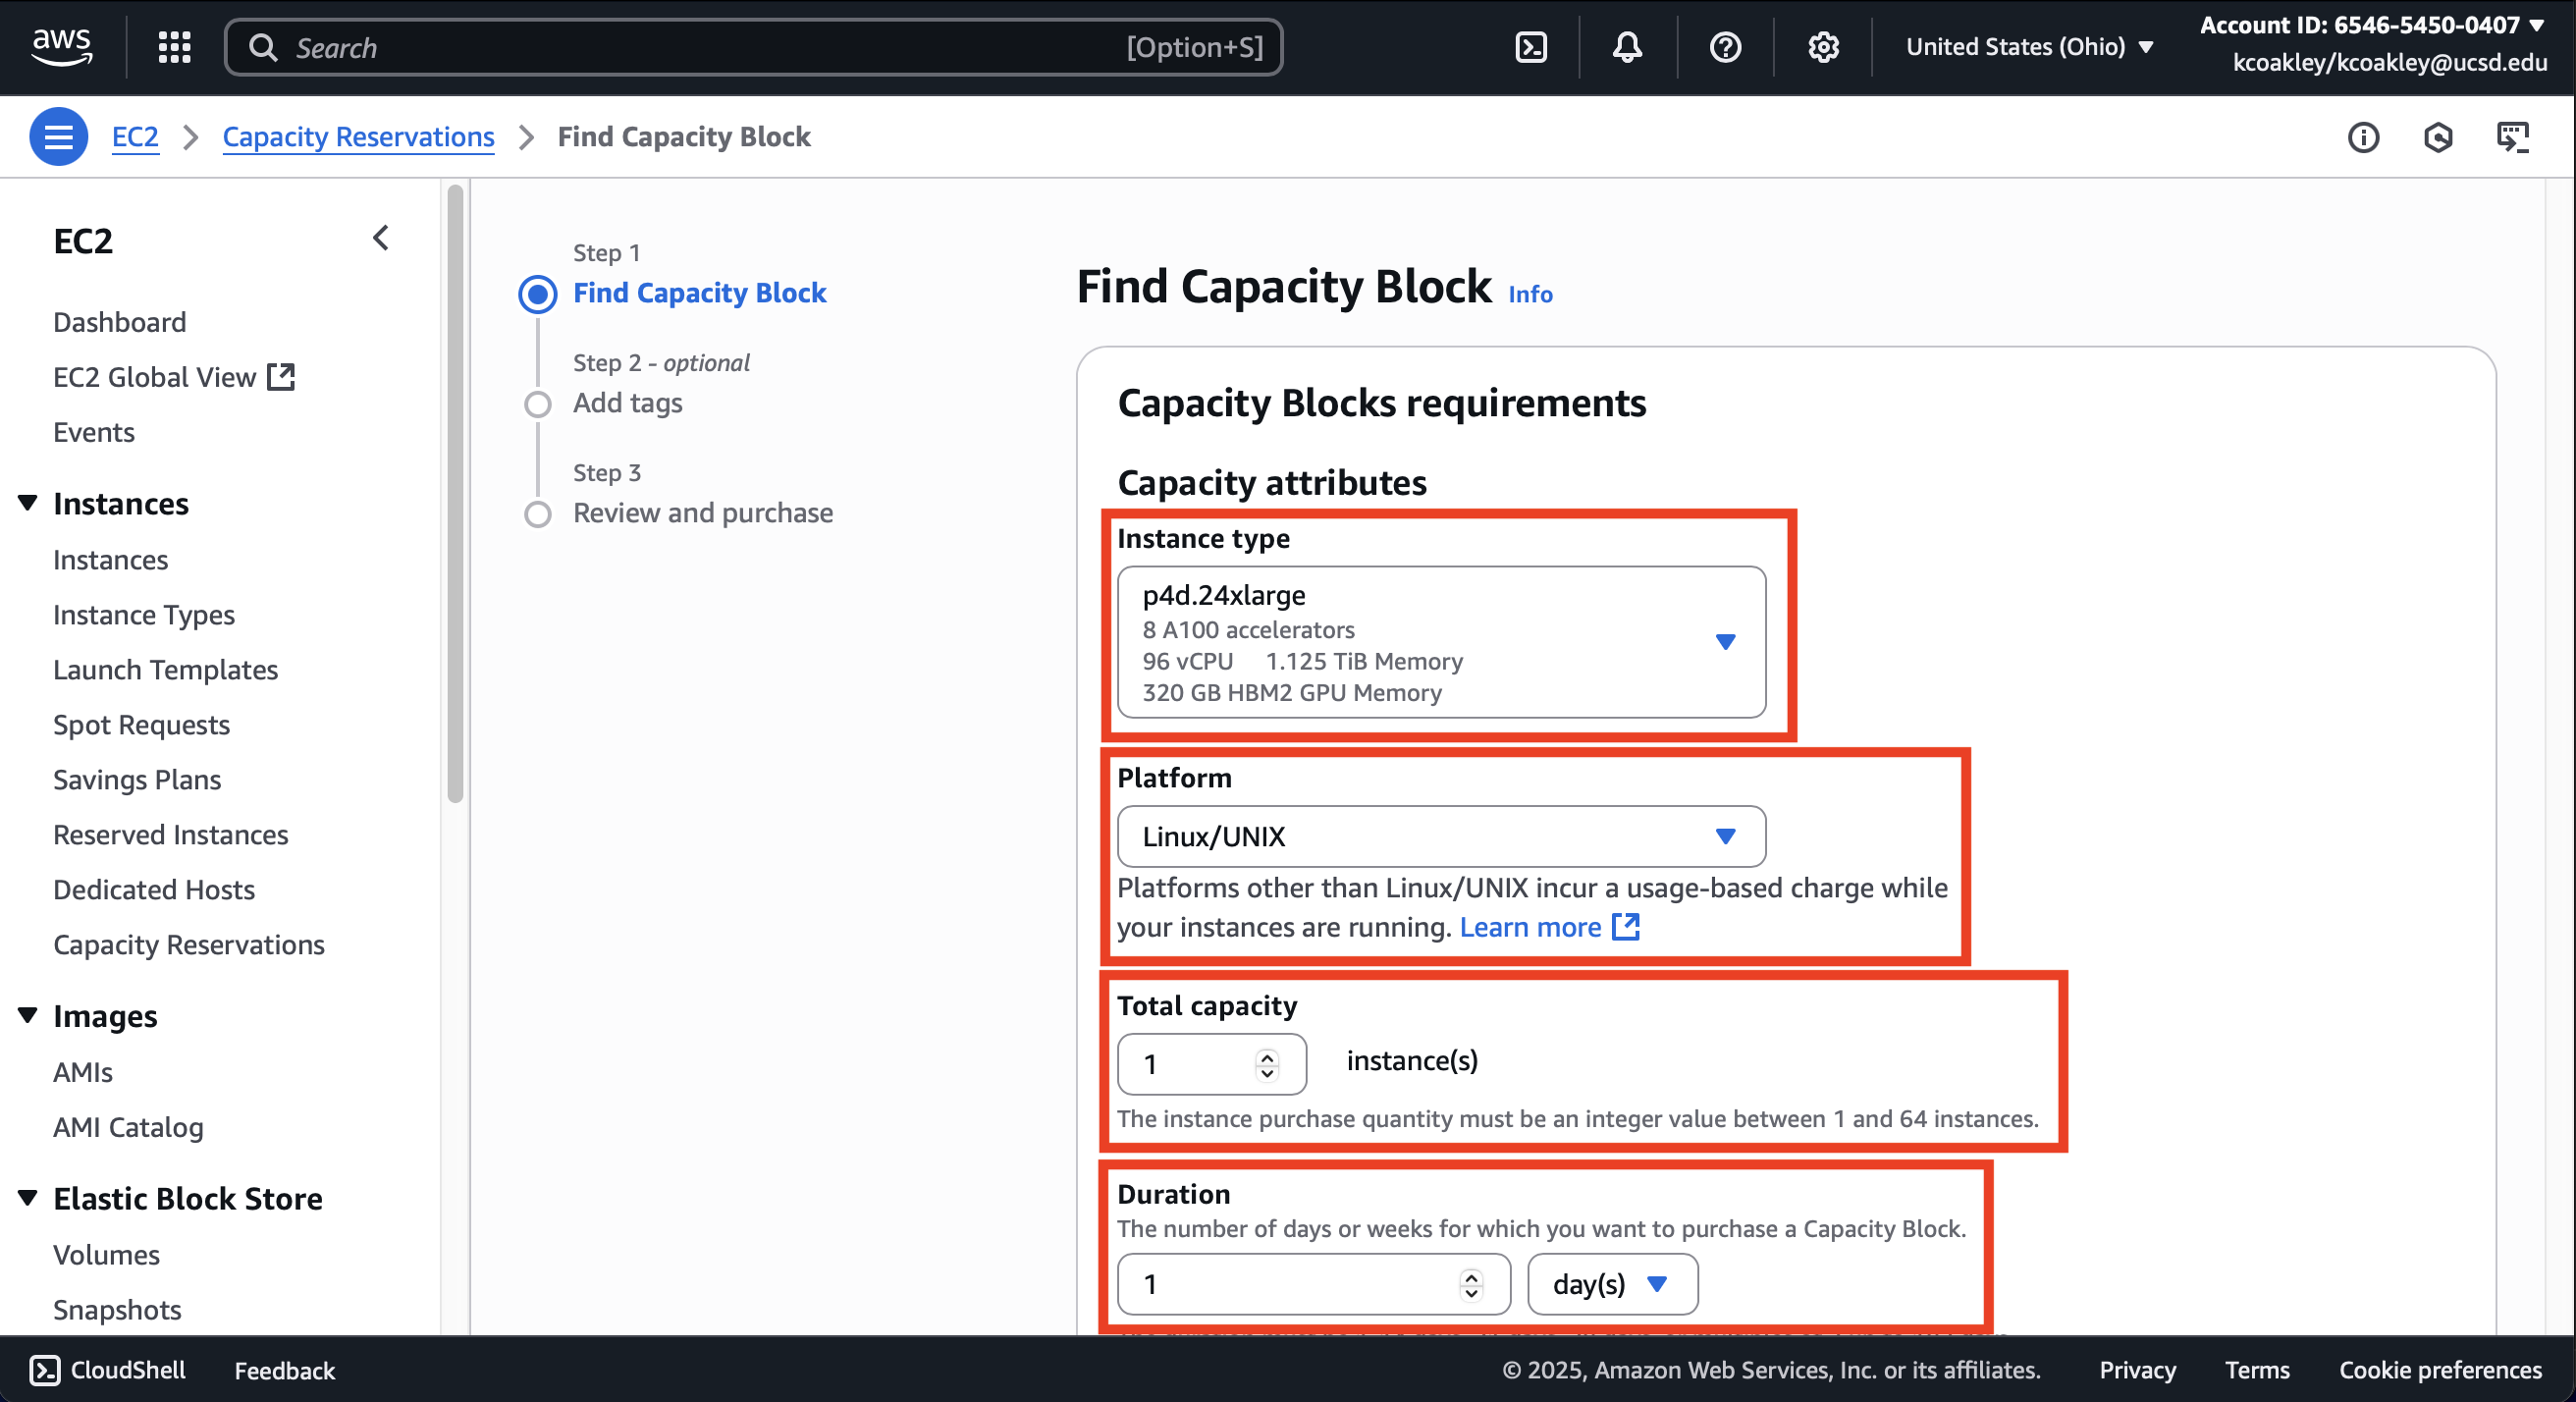
Enter the day you want to reserve the “Capacity Blocks for ML” and select Find Capacity Block. Capacity Blocks always start and stop at 11:30 UTC.
Note, once reserved, the date cannot be changed. Payment is processed at the time the reservation order is placed, not when the reserved capacity becomes available.

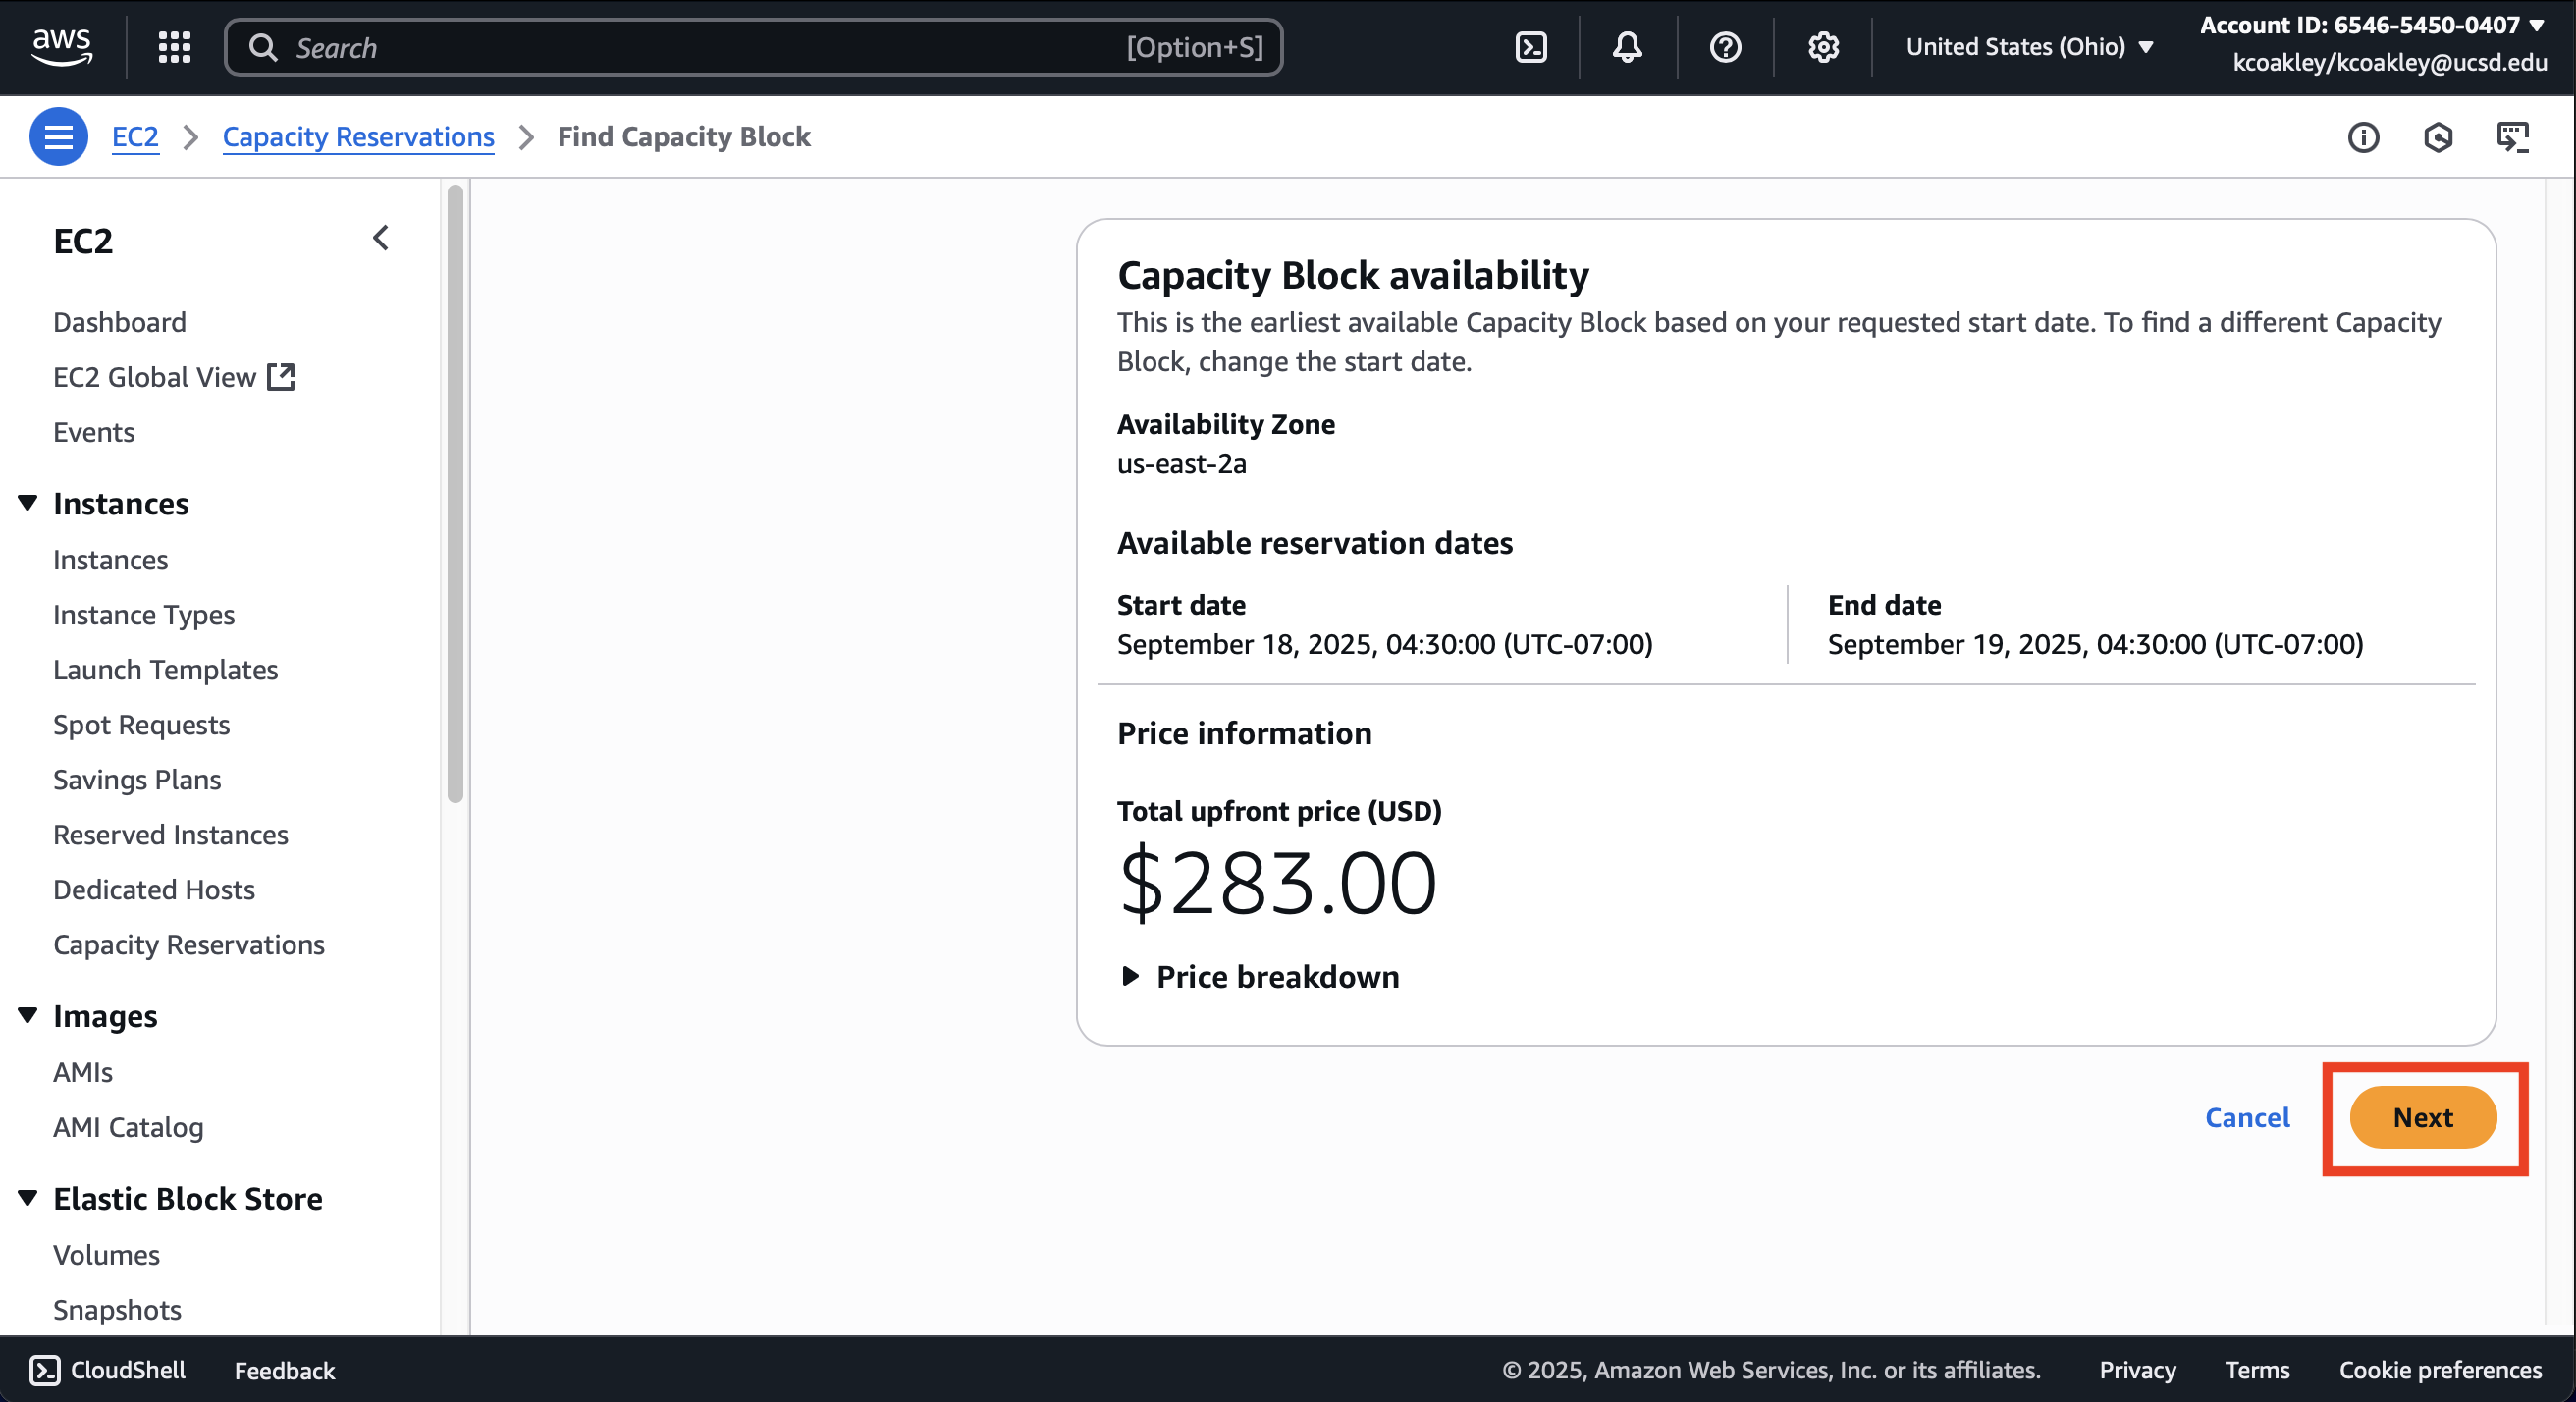
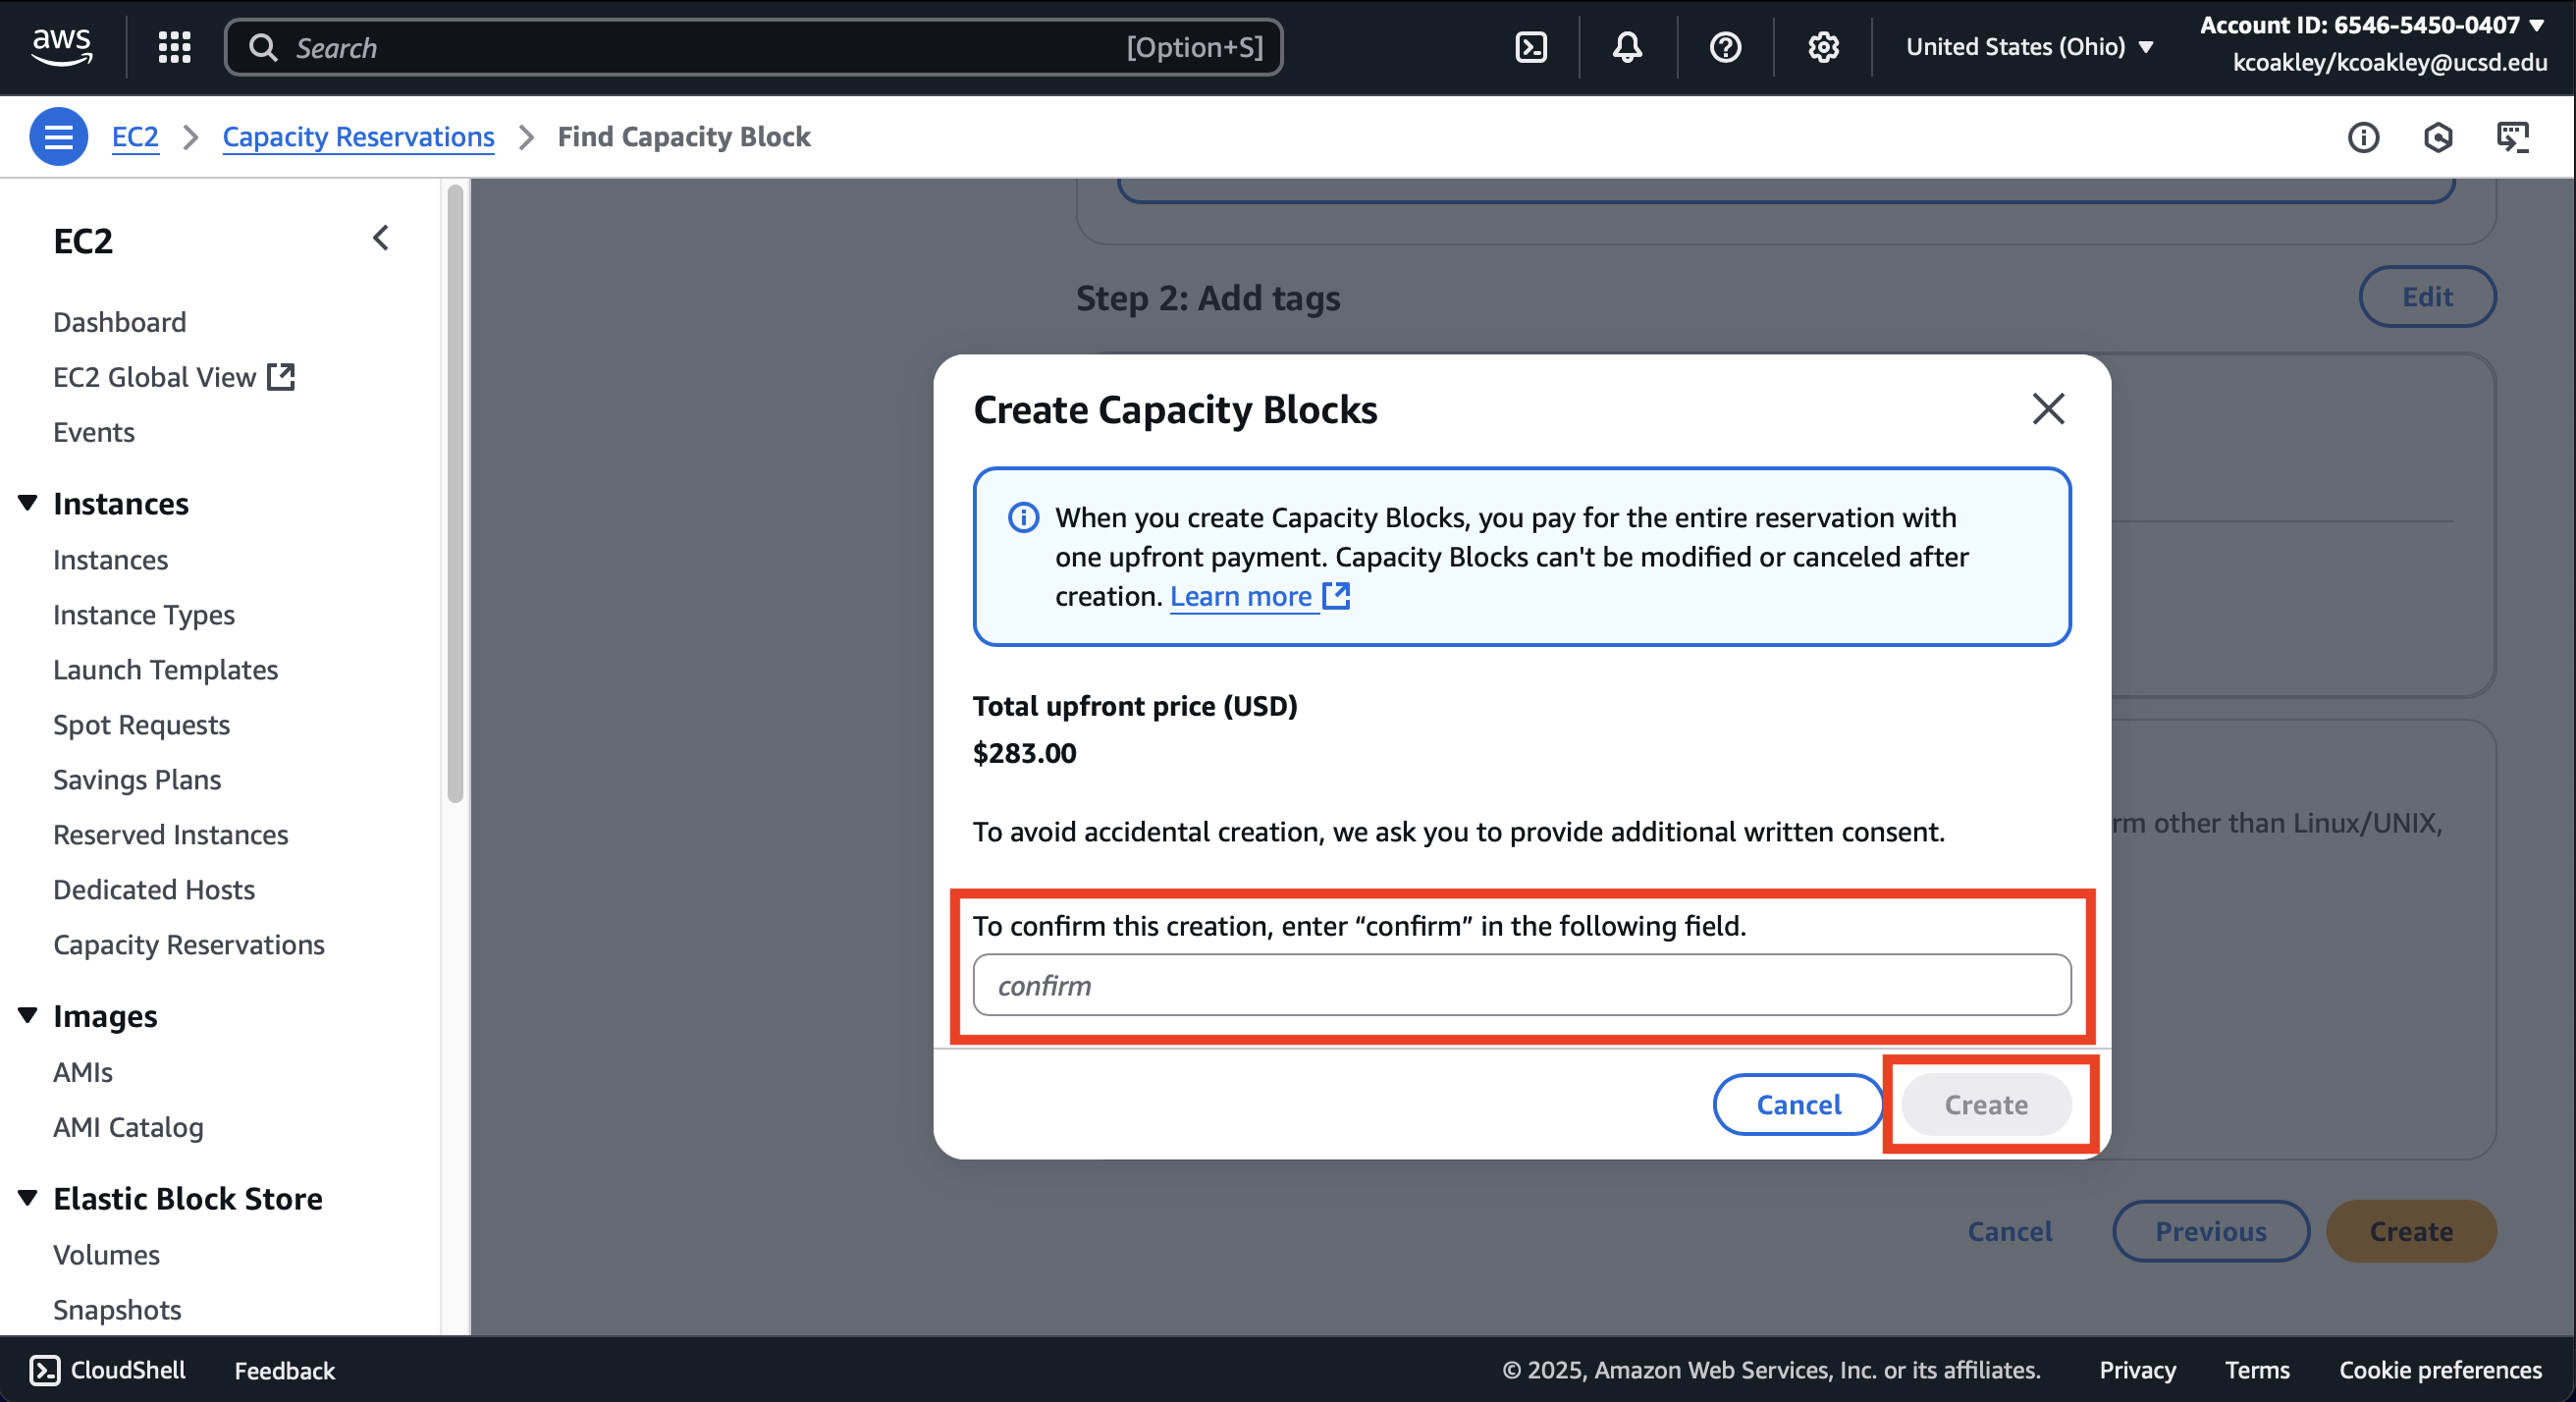
AWS will show a summary of the “Capacity Blocks for ML” reservation. Also note the cost, availability zone, and start and end date and time. You will be charged the full amount no matter how long the instances run and the billing period will promptly start at the start date and time. Then select Next.
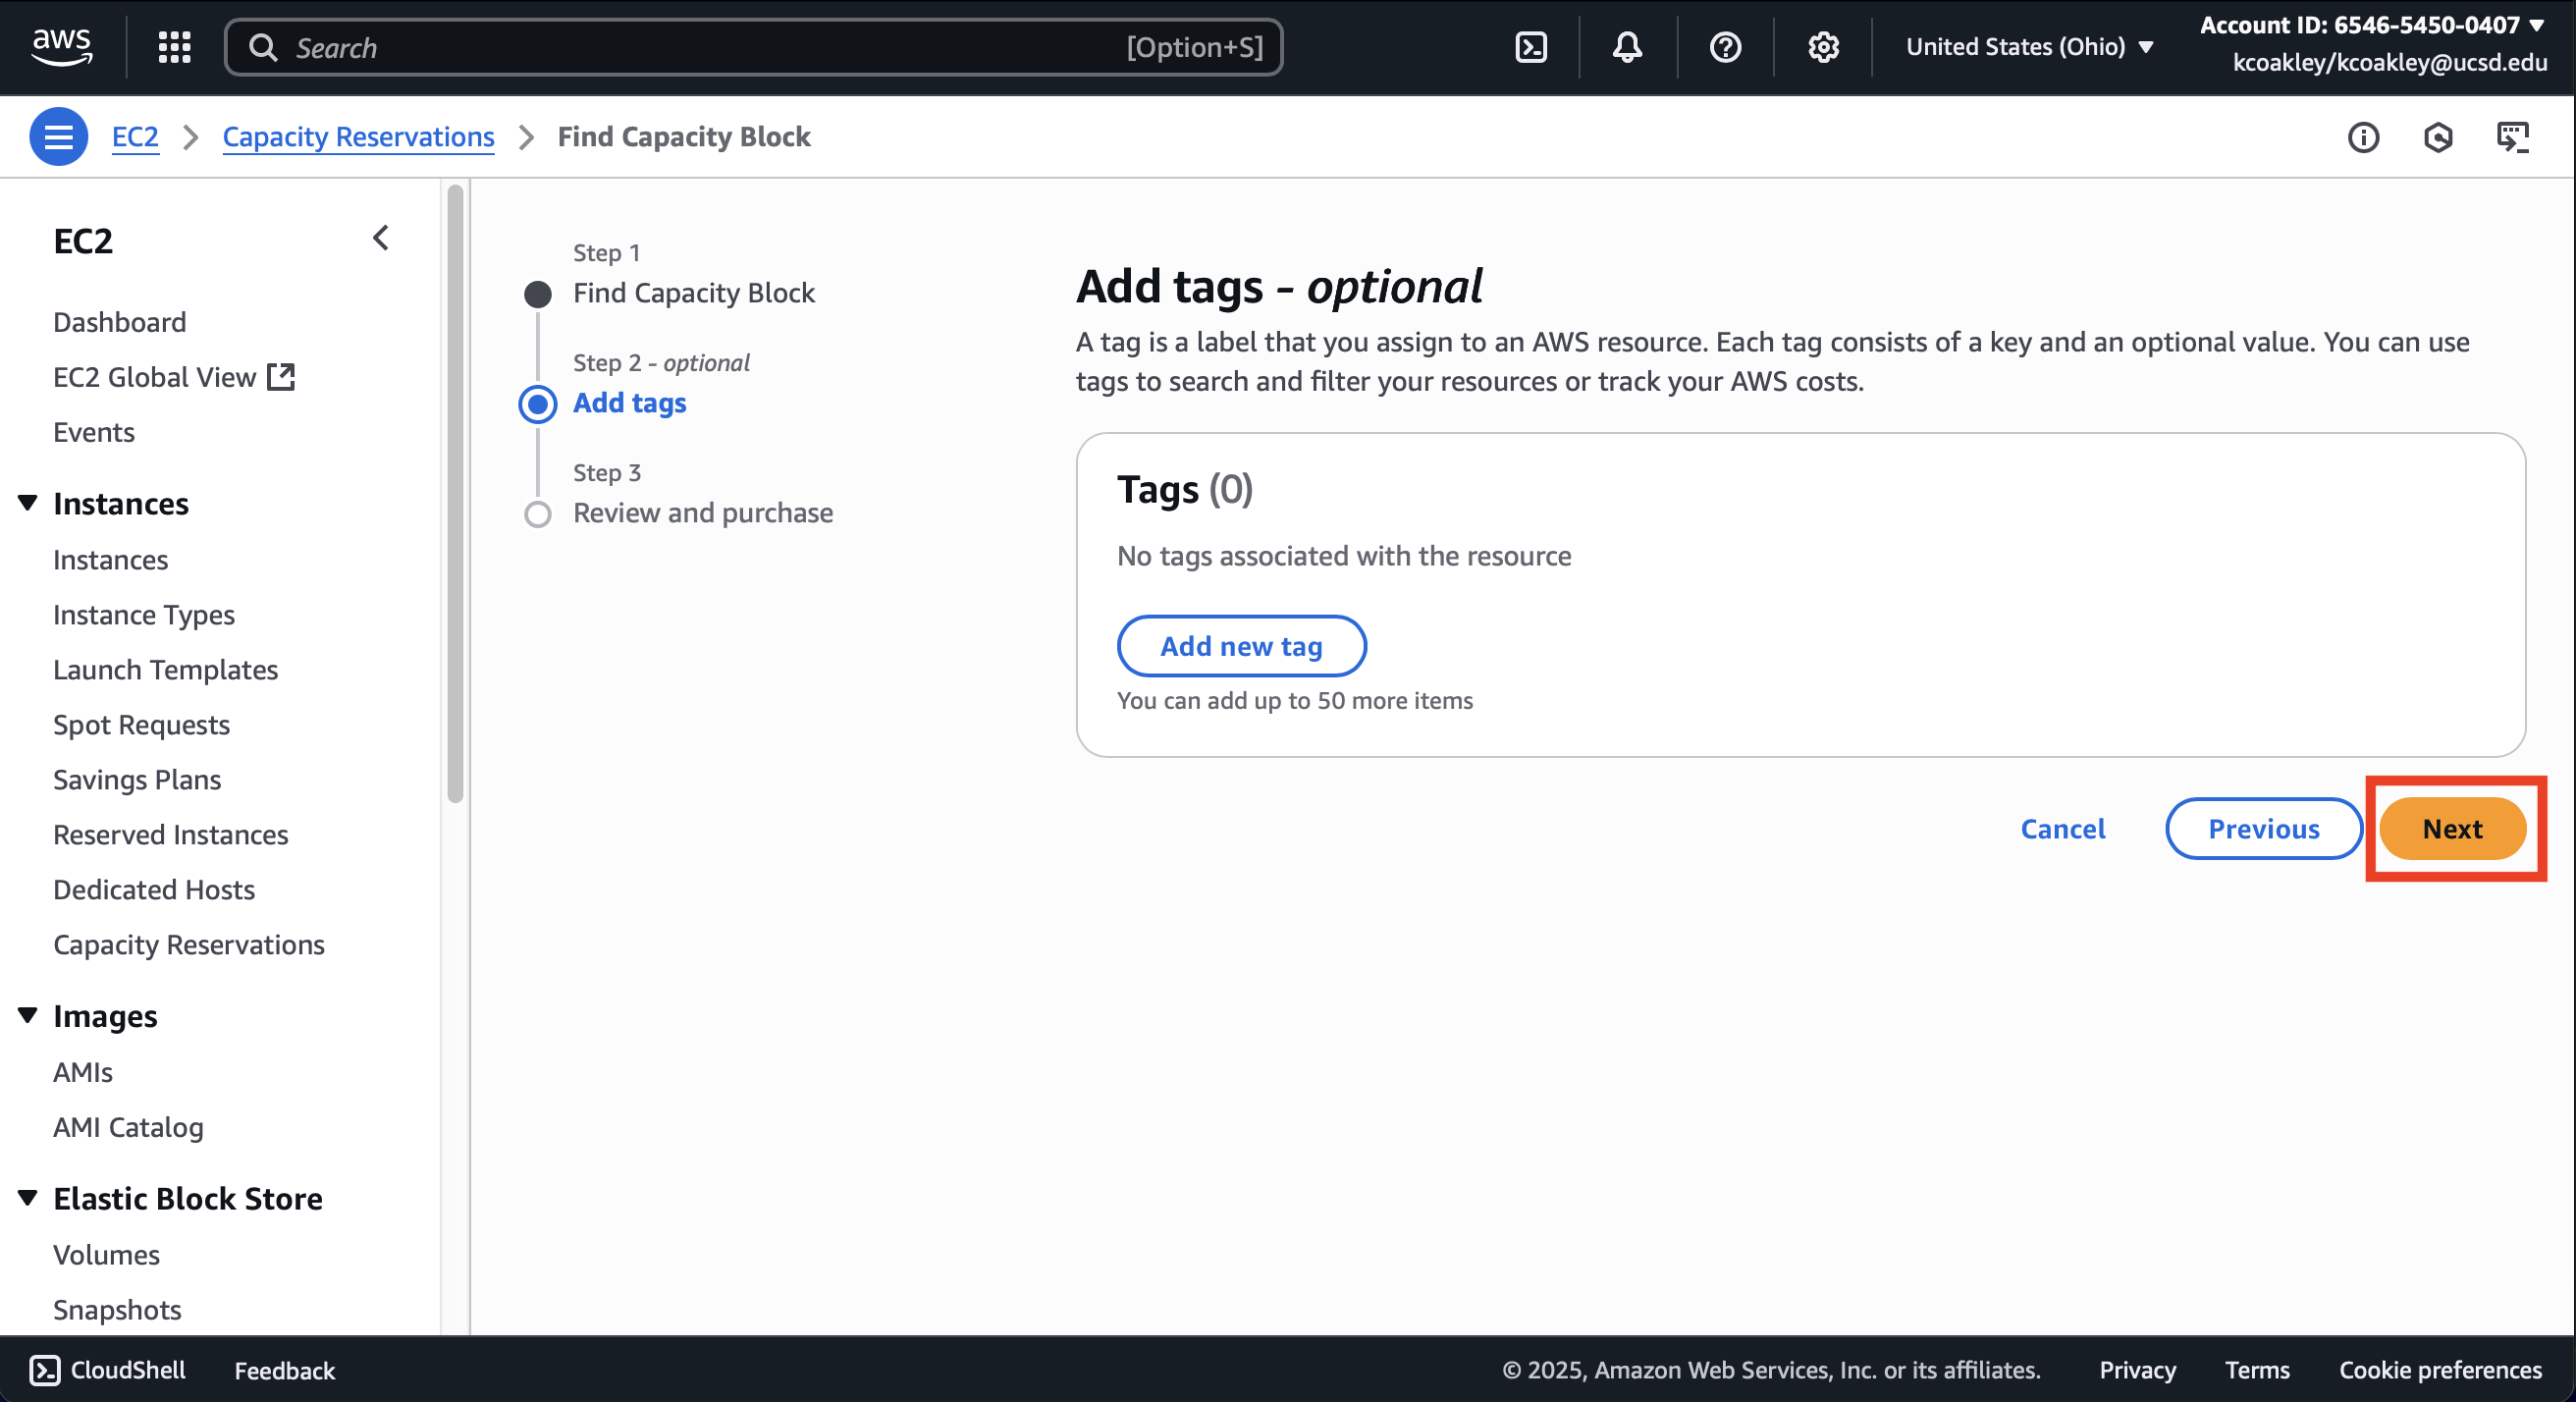
Add Tags, if you wish, then select Next.
Carefully review the details (dates, duration, instance, tags, etc) of the “Capacity Blocks for ML”. Again, after the “Capacity Blocks for ML” has been reserved, it cannot be changed.


Type confirm in the box and select Create to finalize the “Capacity Blocks for ML” reservation.
Your account will be charged the full amount once the Create button is selected.
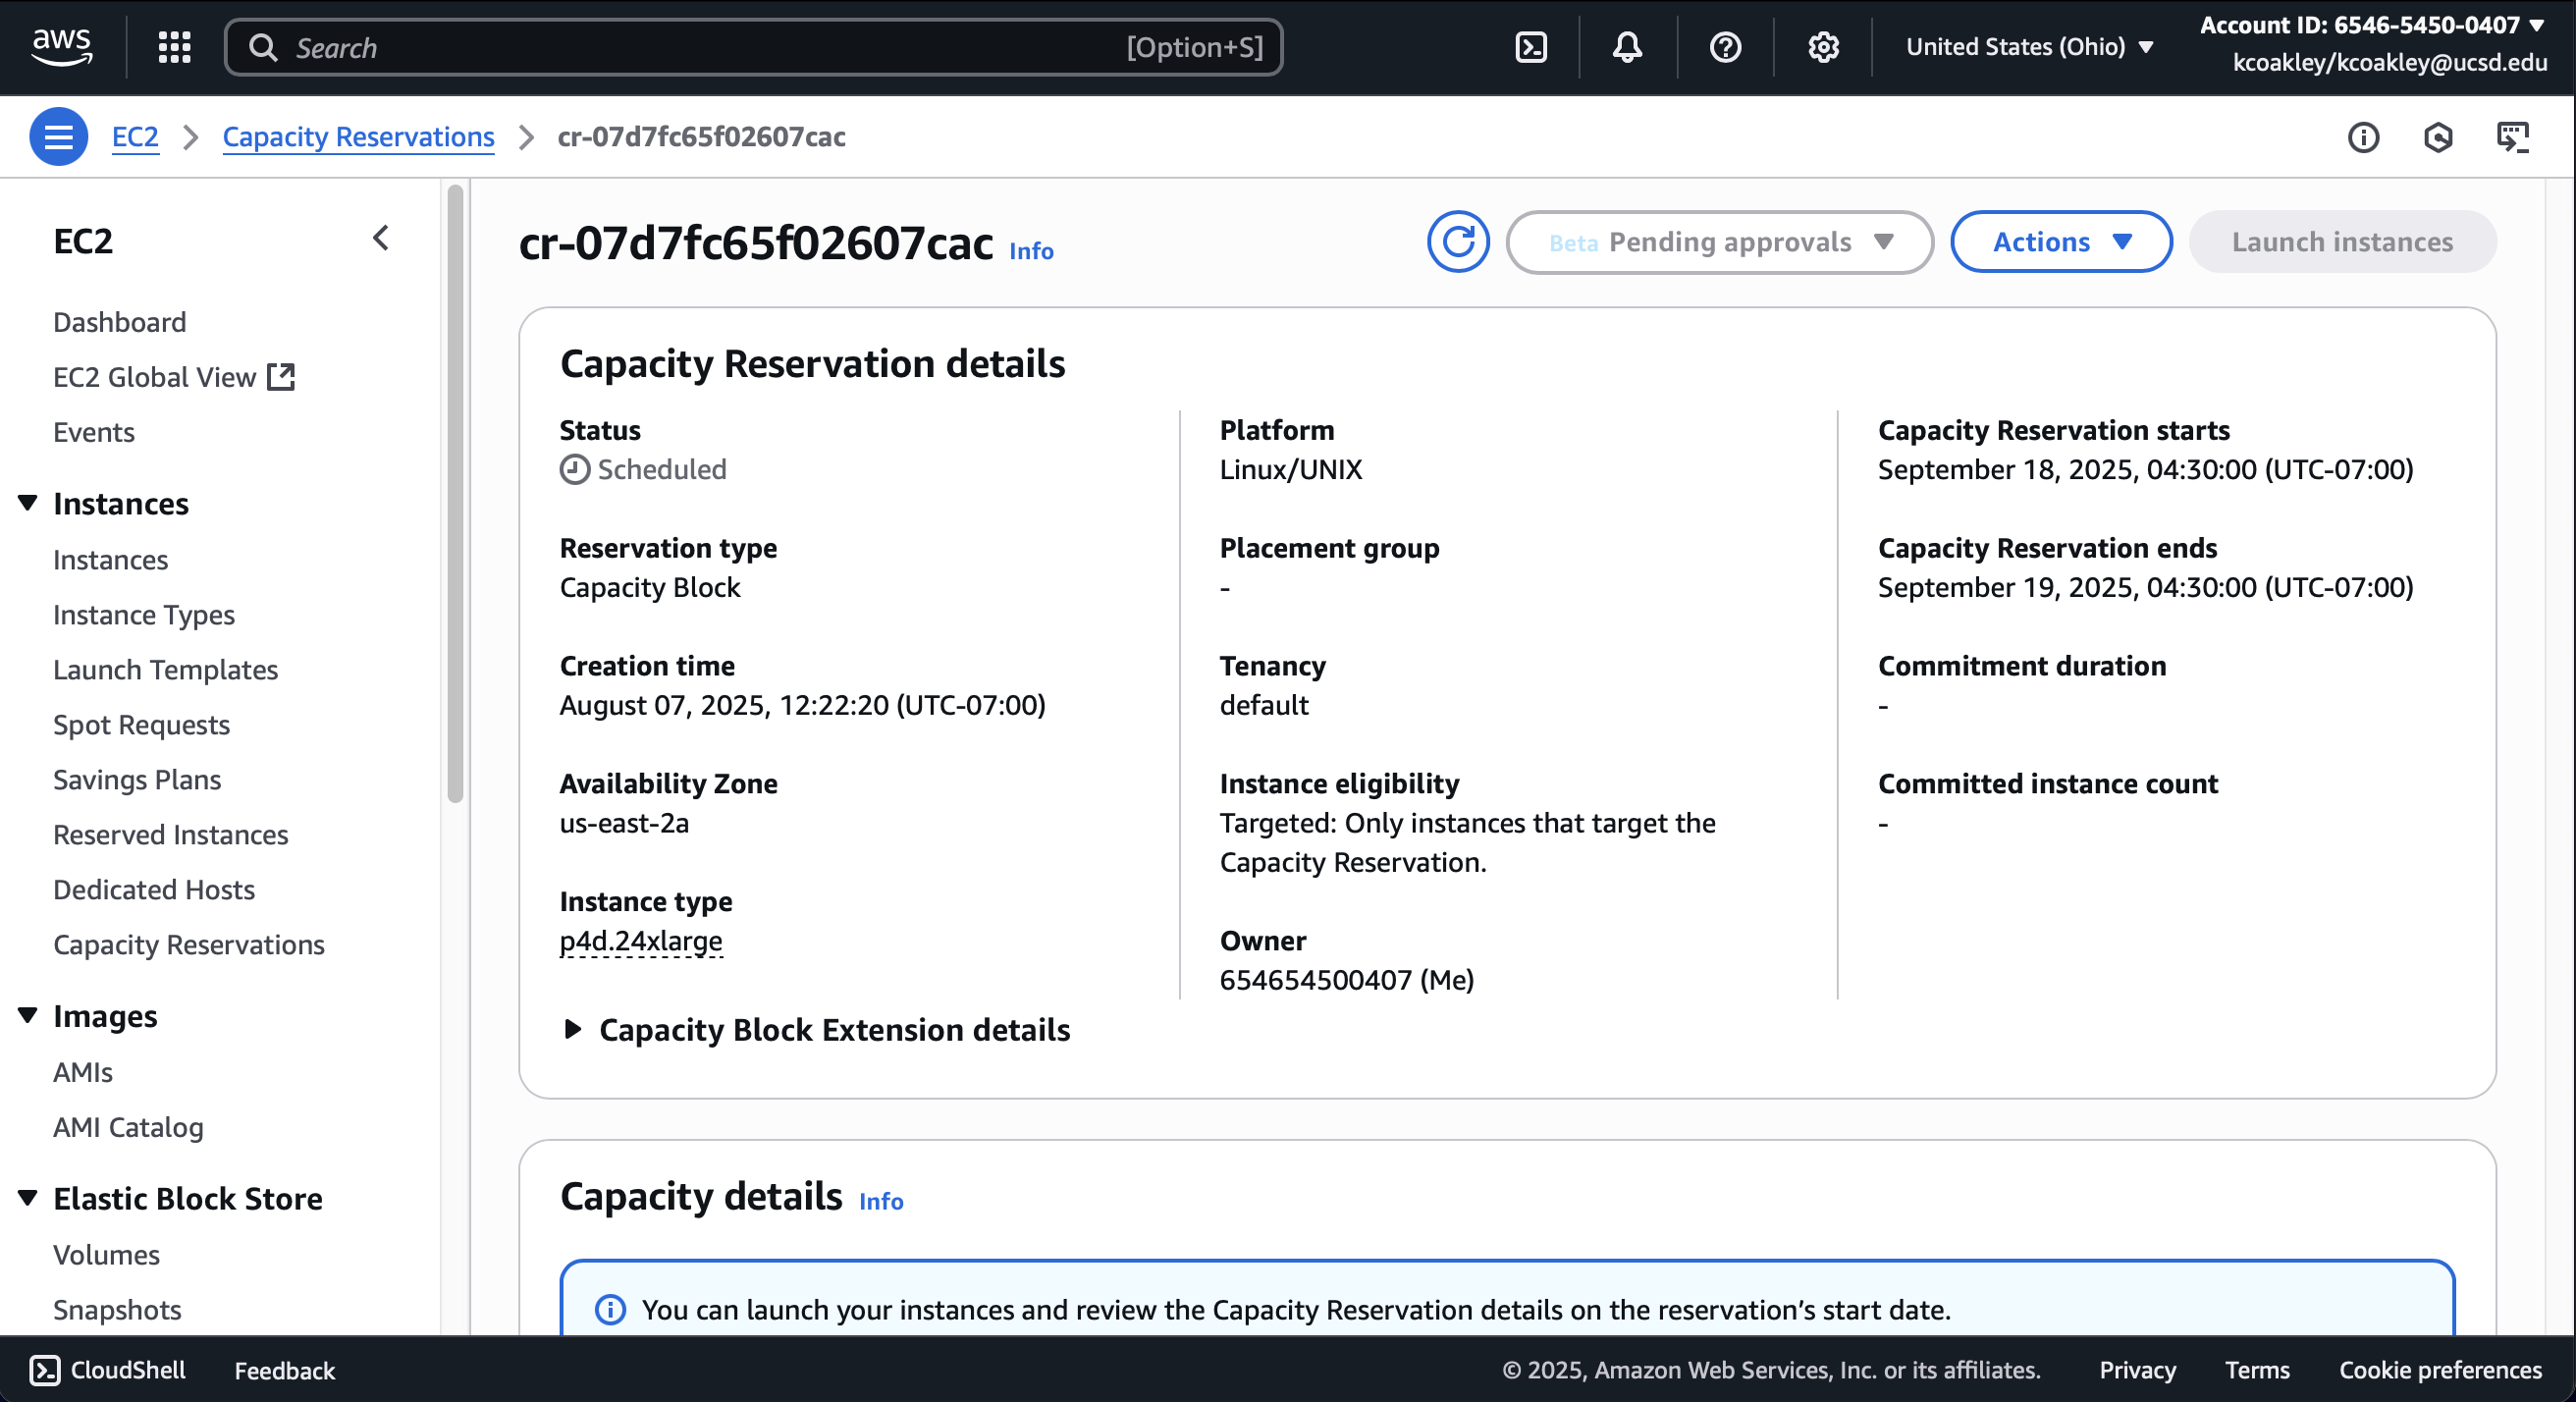
A success message will be displayed, confirming the “Capacity Blocks for ML” has been scheduled and you will be taken to the Capacity Reservations page, where a list of all scheduled reservations will be shown.

You can click on each item in the Capacity Reservations list to see the details.
When the time and date for the “Capacity Blocks for ML” arrives, you can launch the instances as normal using the EC2 launch methods. Make sure you select the same Instance Type, Platform/Operating System, and Availability Zone as specified in your “Capacity Blocks for ML” reservation.
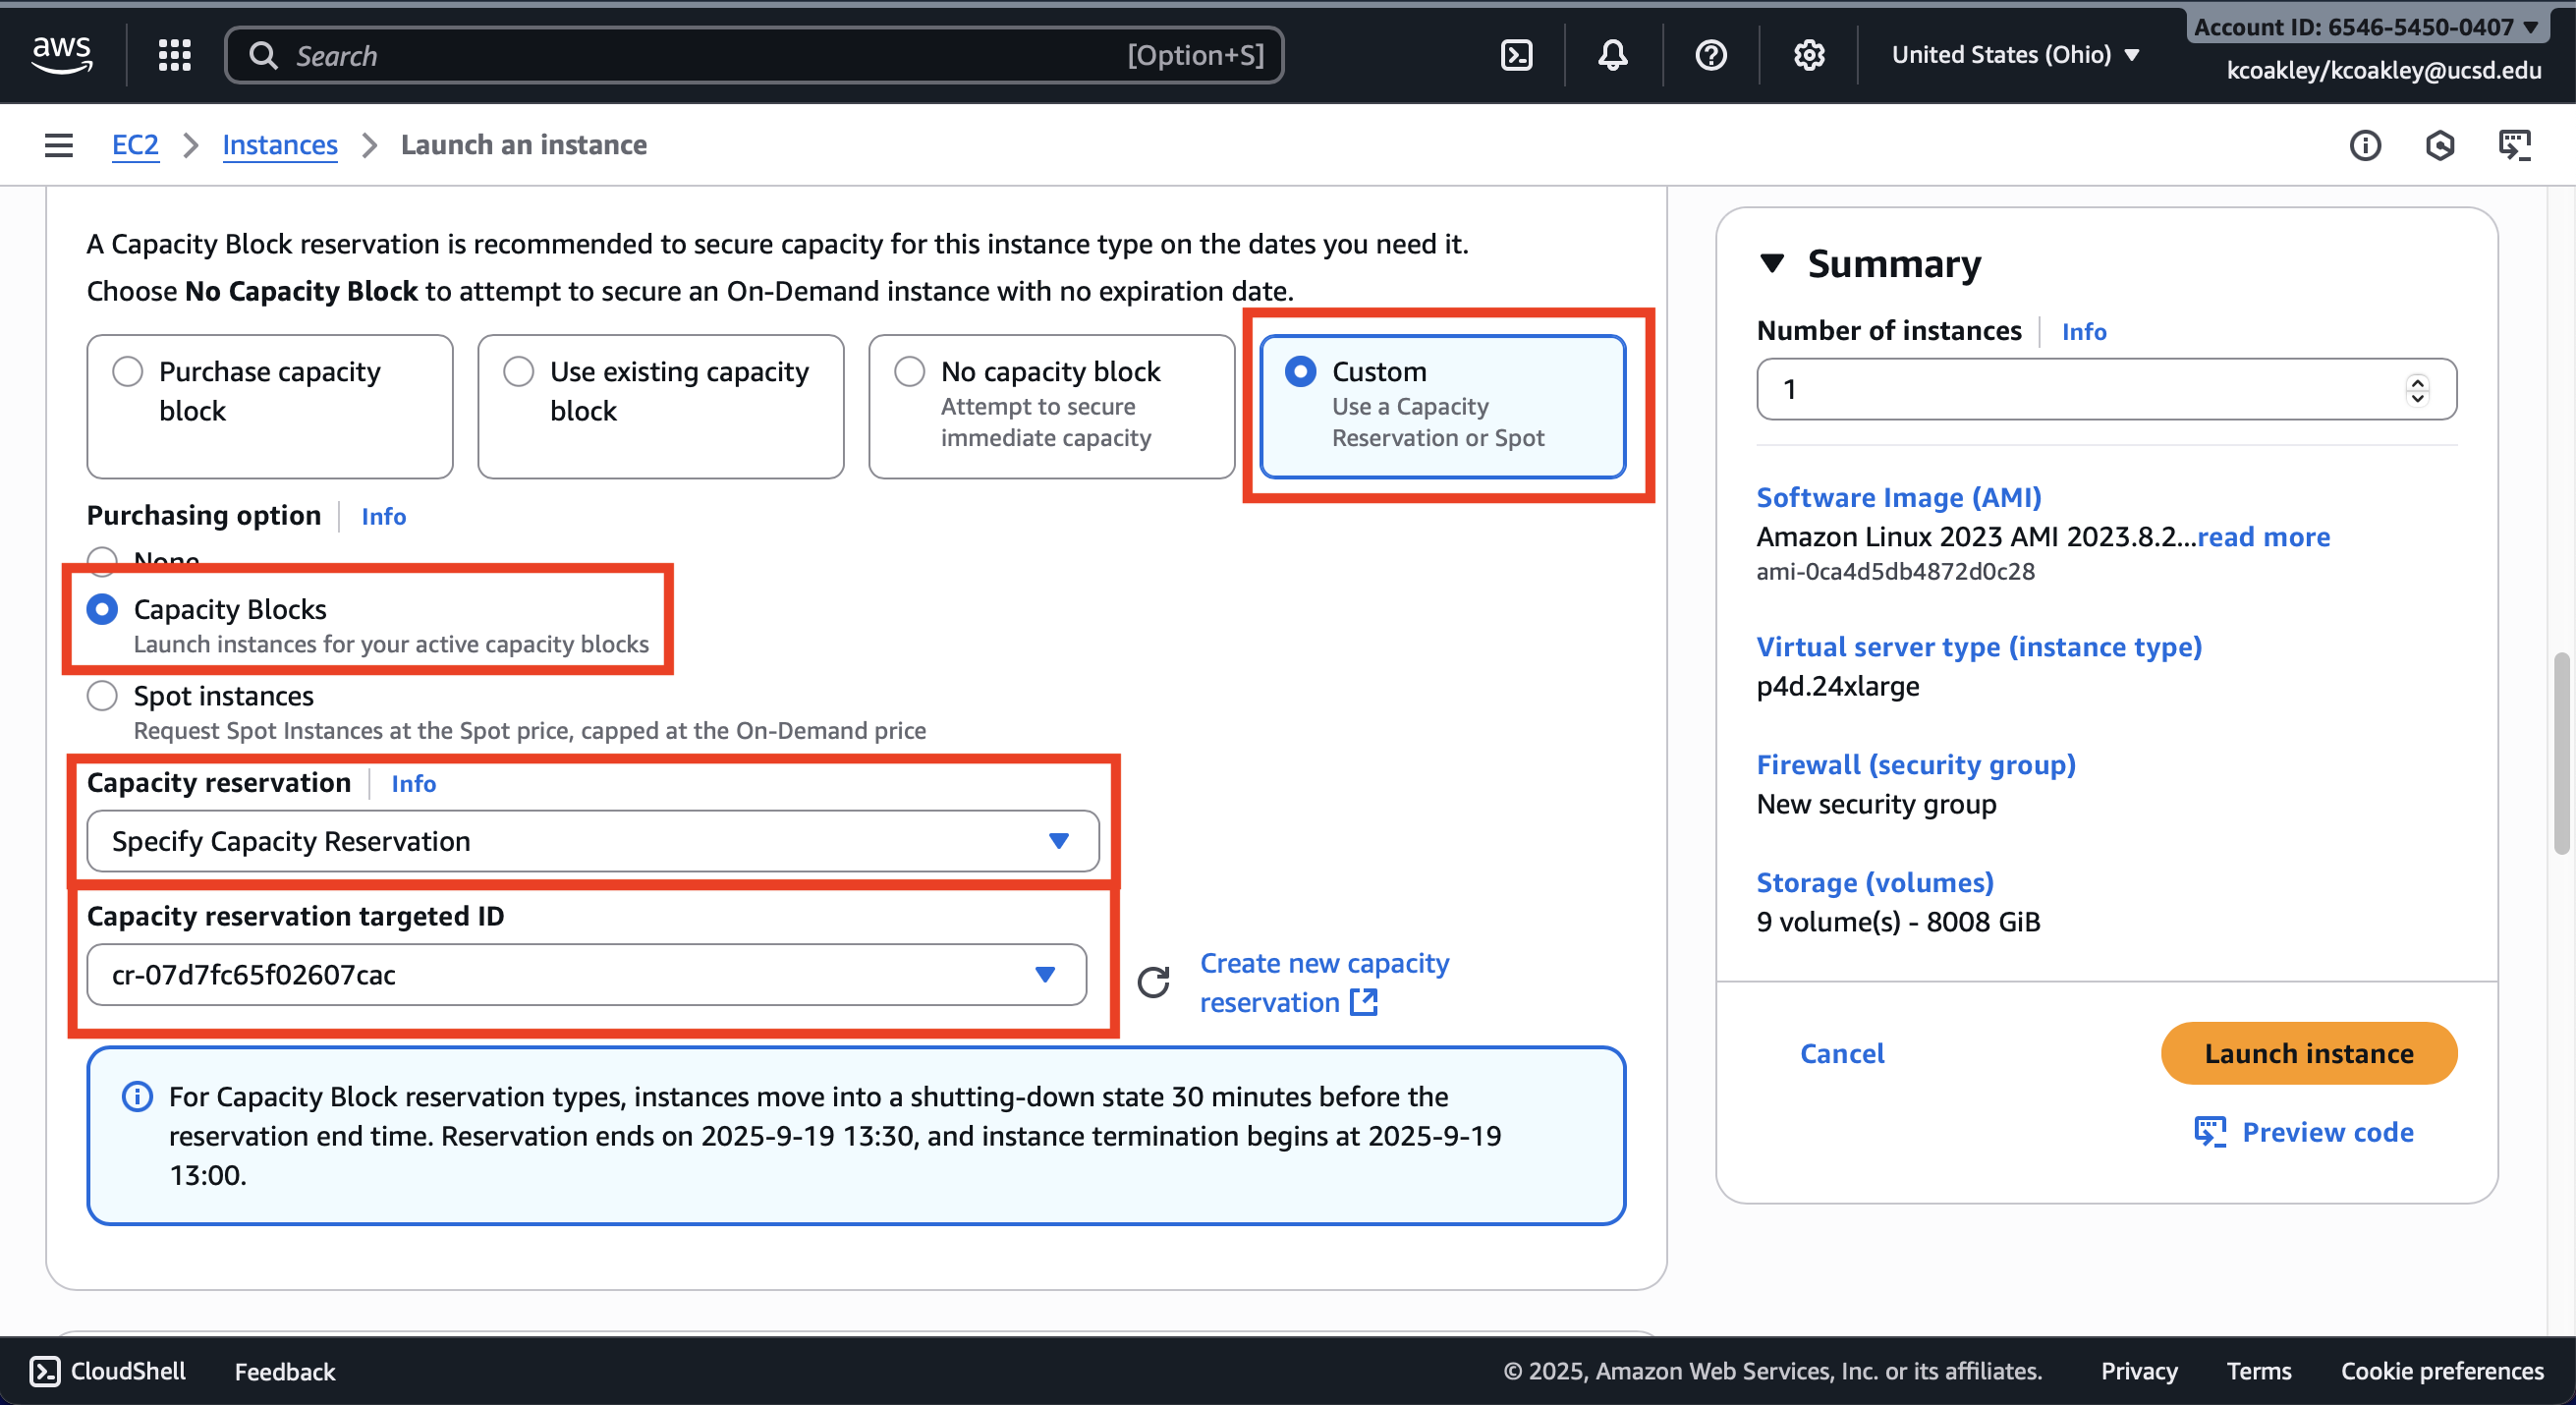
Note: 30mins before the “Capacity Blocks for ML” reservation end time, any EC2 instances launched under the block will be shut down automatically, regardless of their current workload or processes. The instances cannot be restarted or re-accessed after termination.
To avoid data loss, make sure to save all work and output to persistent storage such as AWS S3 or EBS before this shutdown window begins.
Using an Active Capacity Block Reservation
During the Capacity Block window the status will change to Active and the number of available instances will be listed.

Select the Instance for the details view and select Launch Instances.

Give the Instance a name.

Select the OS Image, either a custom AMI that you created or one of Amazon’s AMIs. Make sure the OS type matches the Platform selected when the Capacity Block was reserved.

Verify the preselected instance type matches the instance type reserved for the Capacity Block.
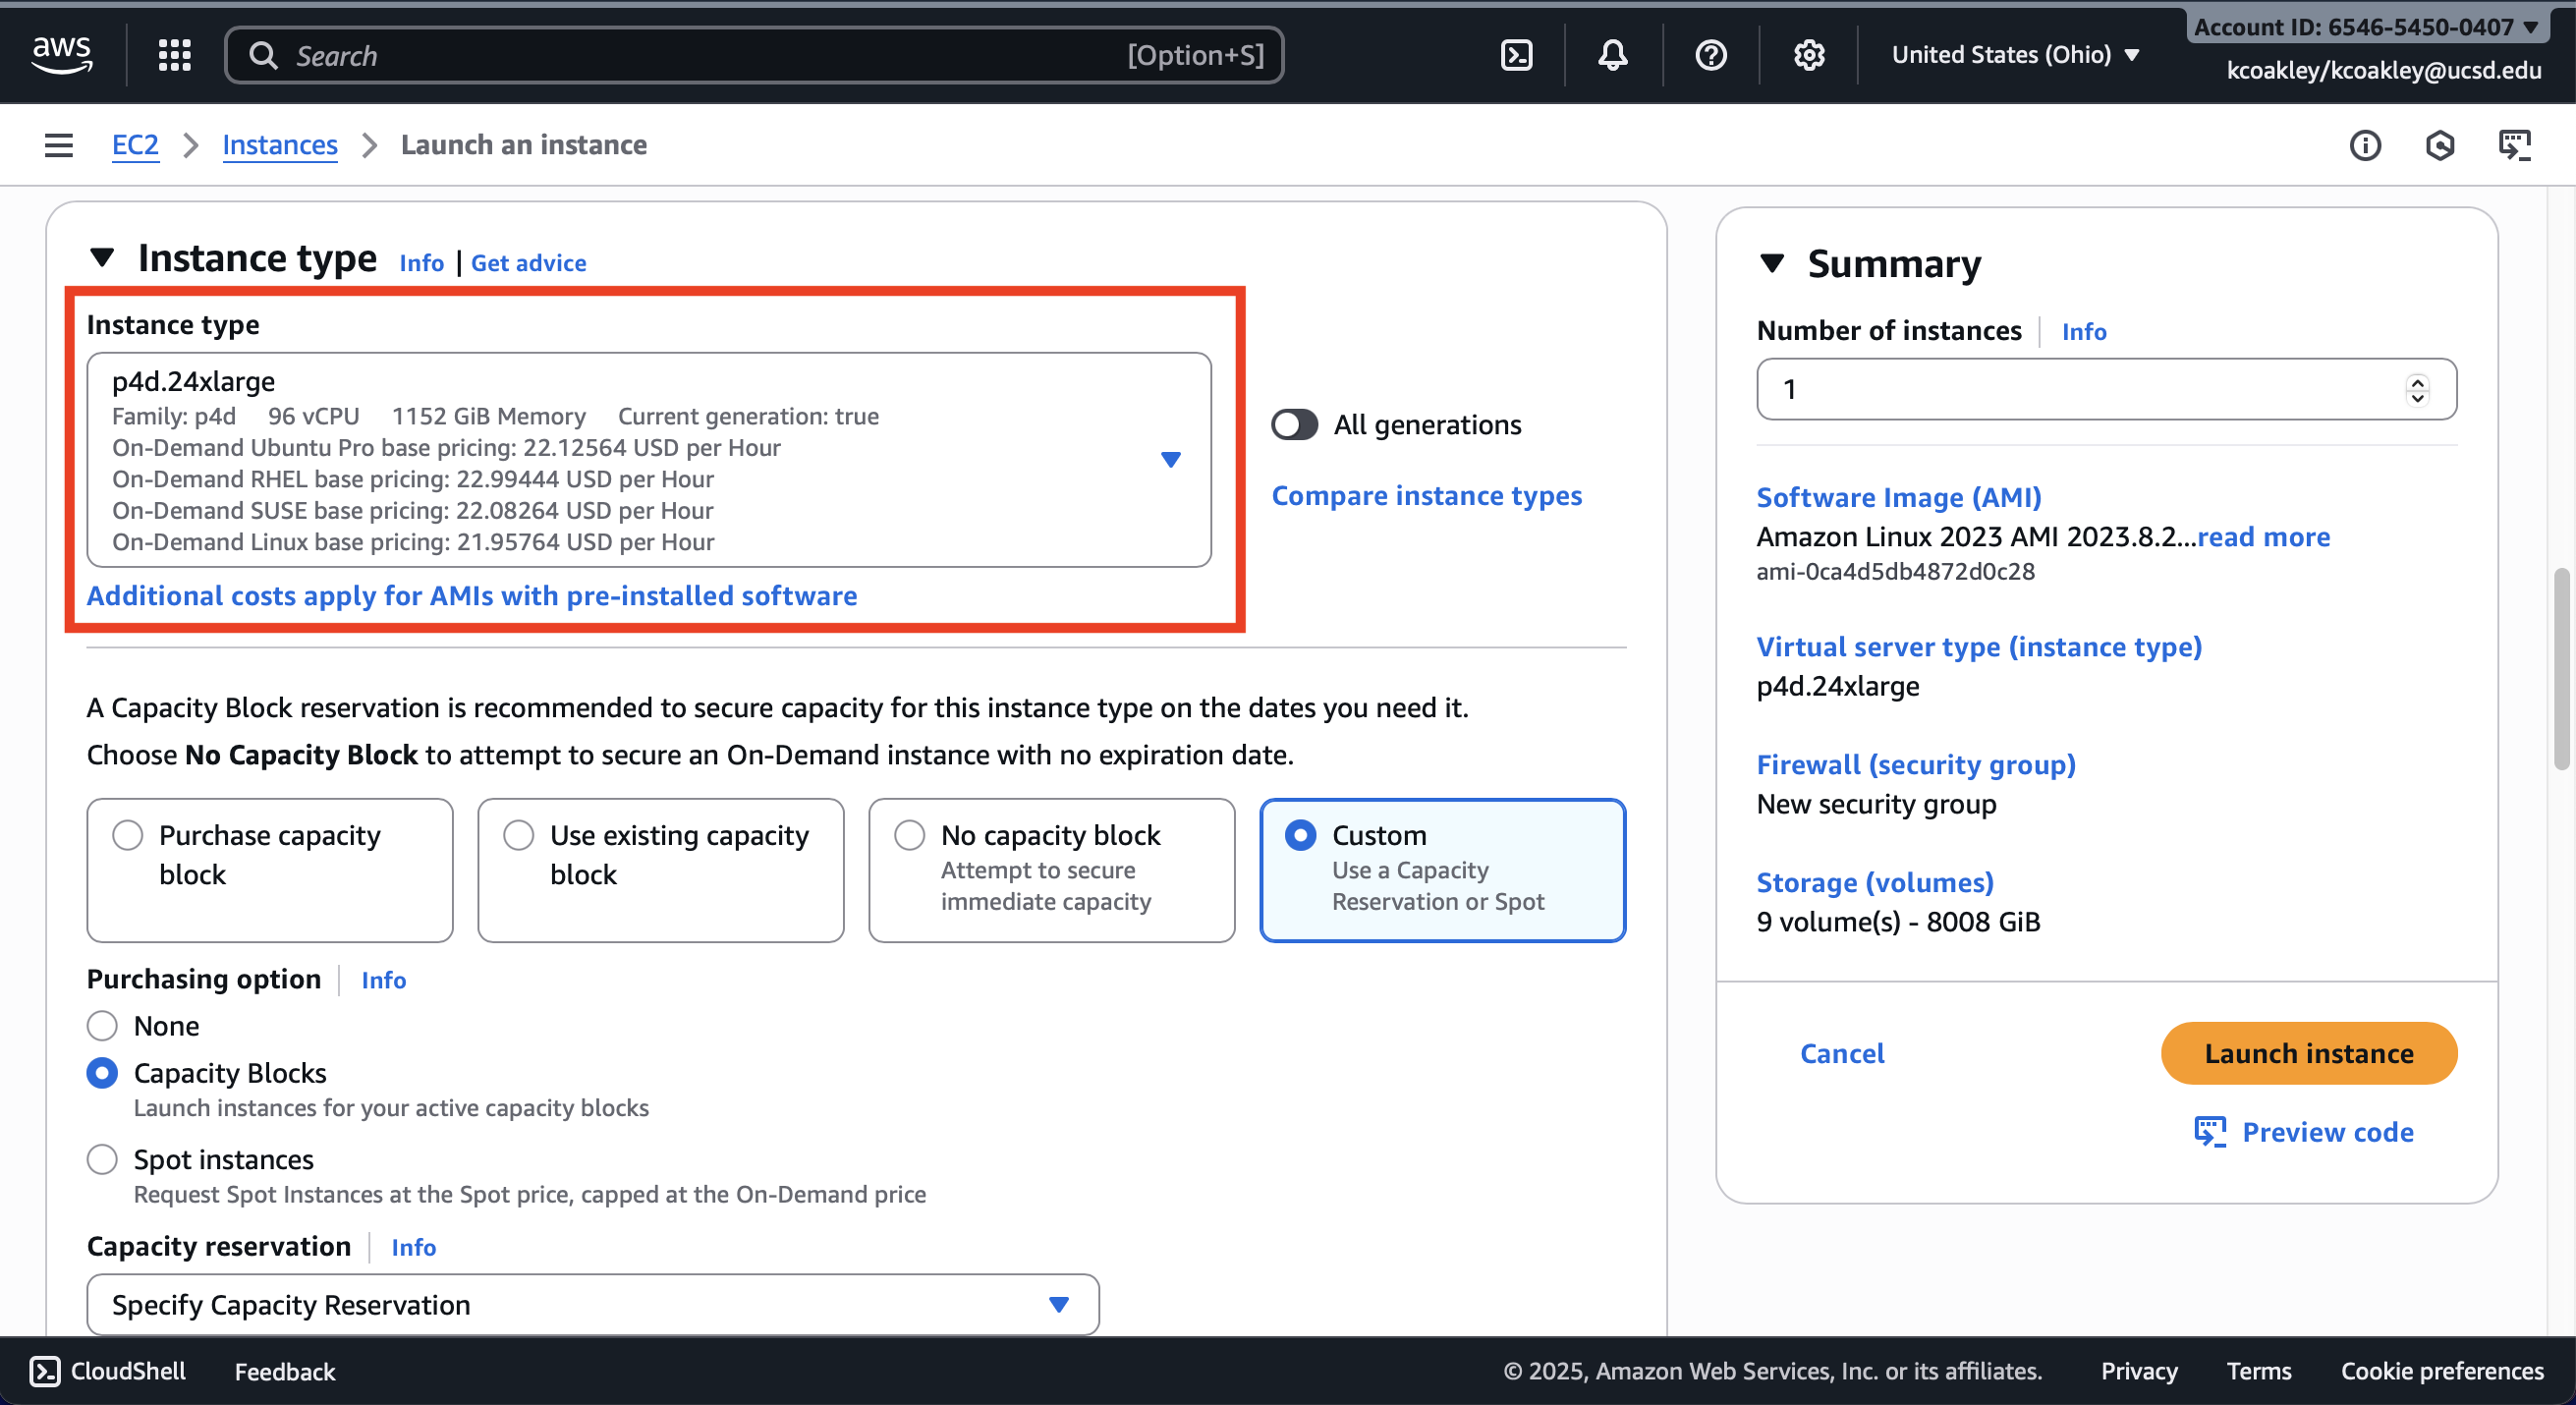
The Capacity Block details should be preselected. Verify the Capacity reservation targeted ID matches the Capacity Block that you want to use.
Select the name of the key pair you want to use.

Select either “Create security group” or “Select an existing security group”.

You can add additional storage and update the advanced settings, then select Launch Instance.
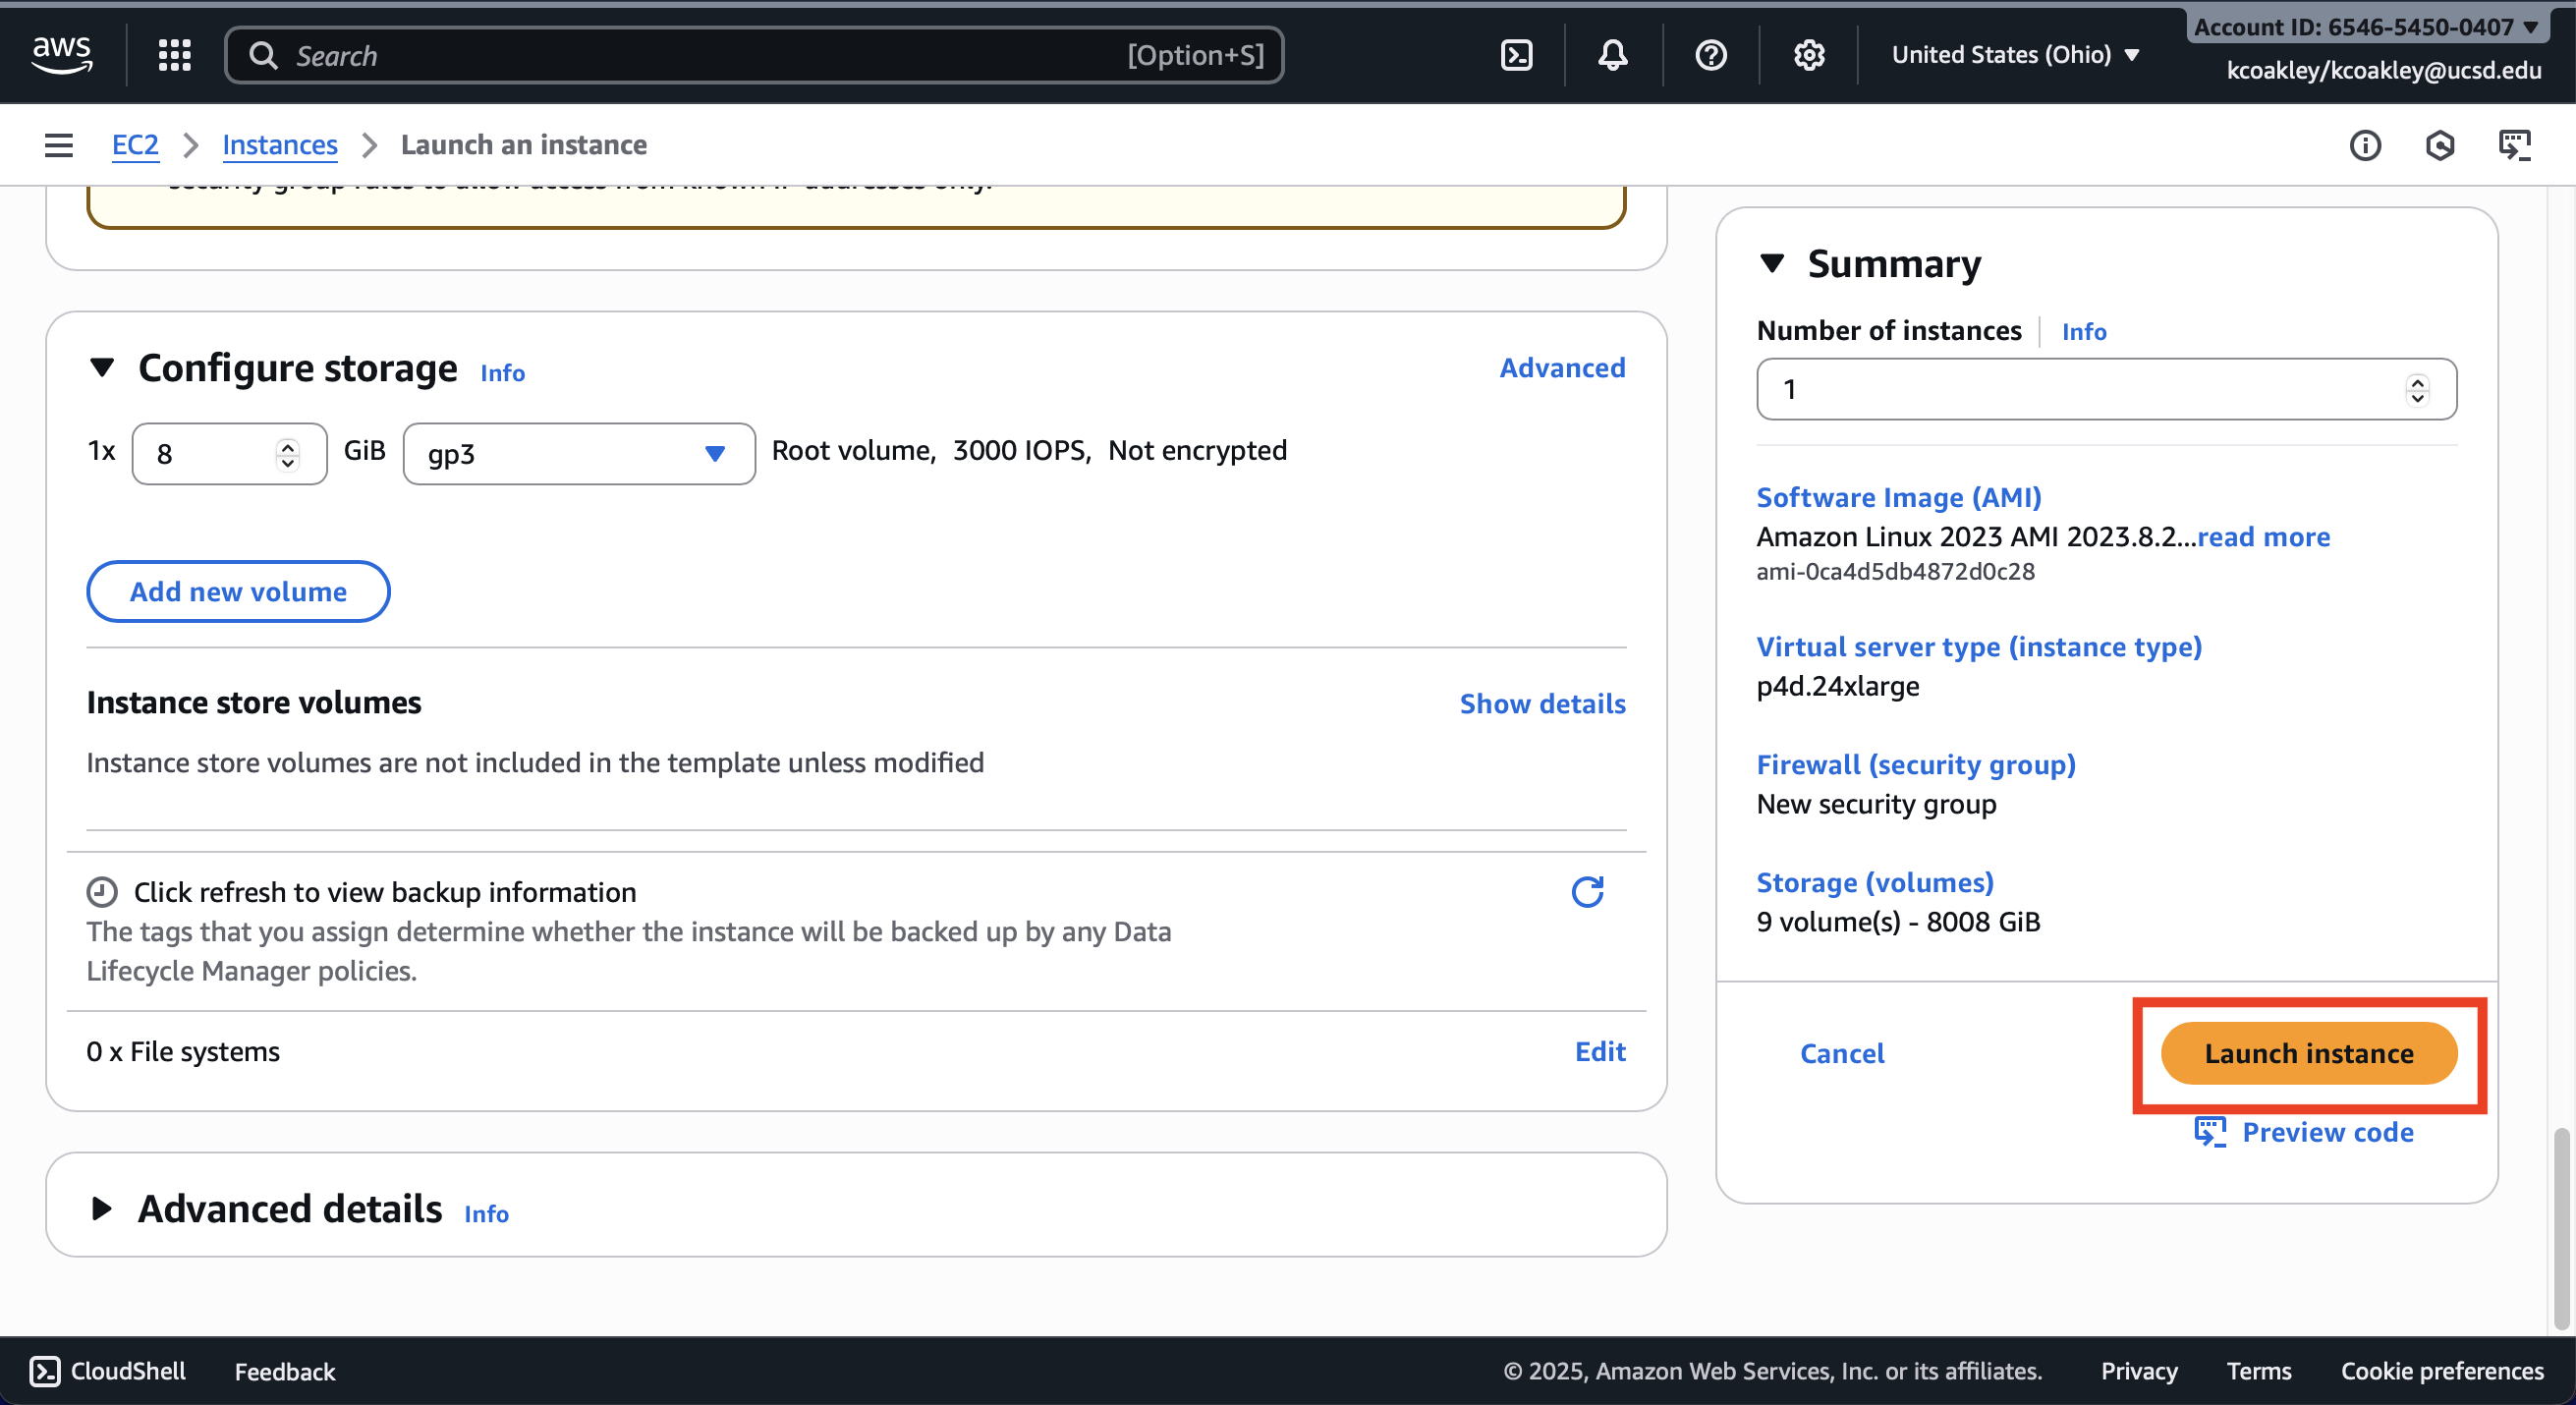
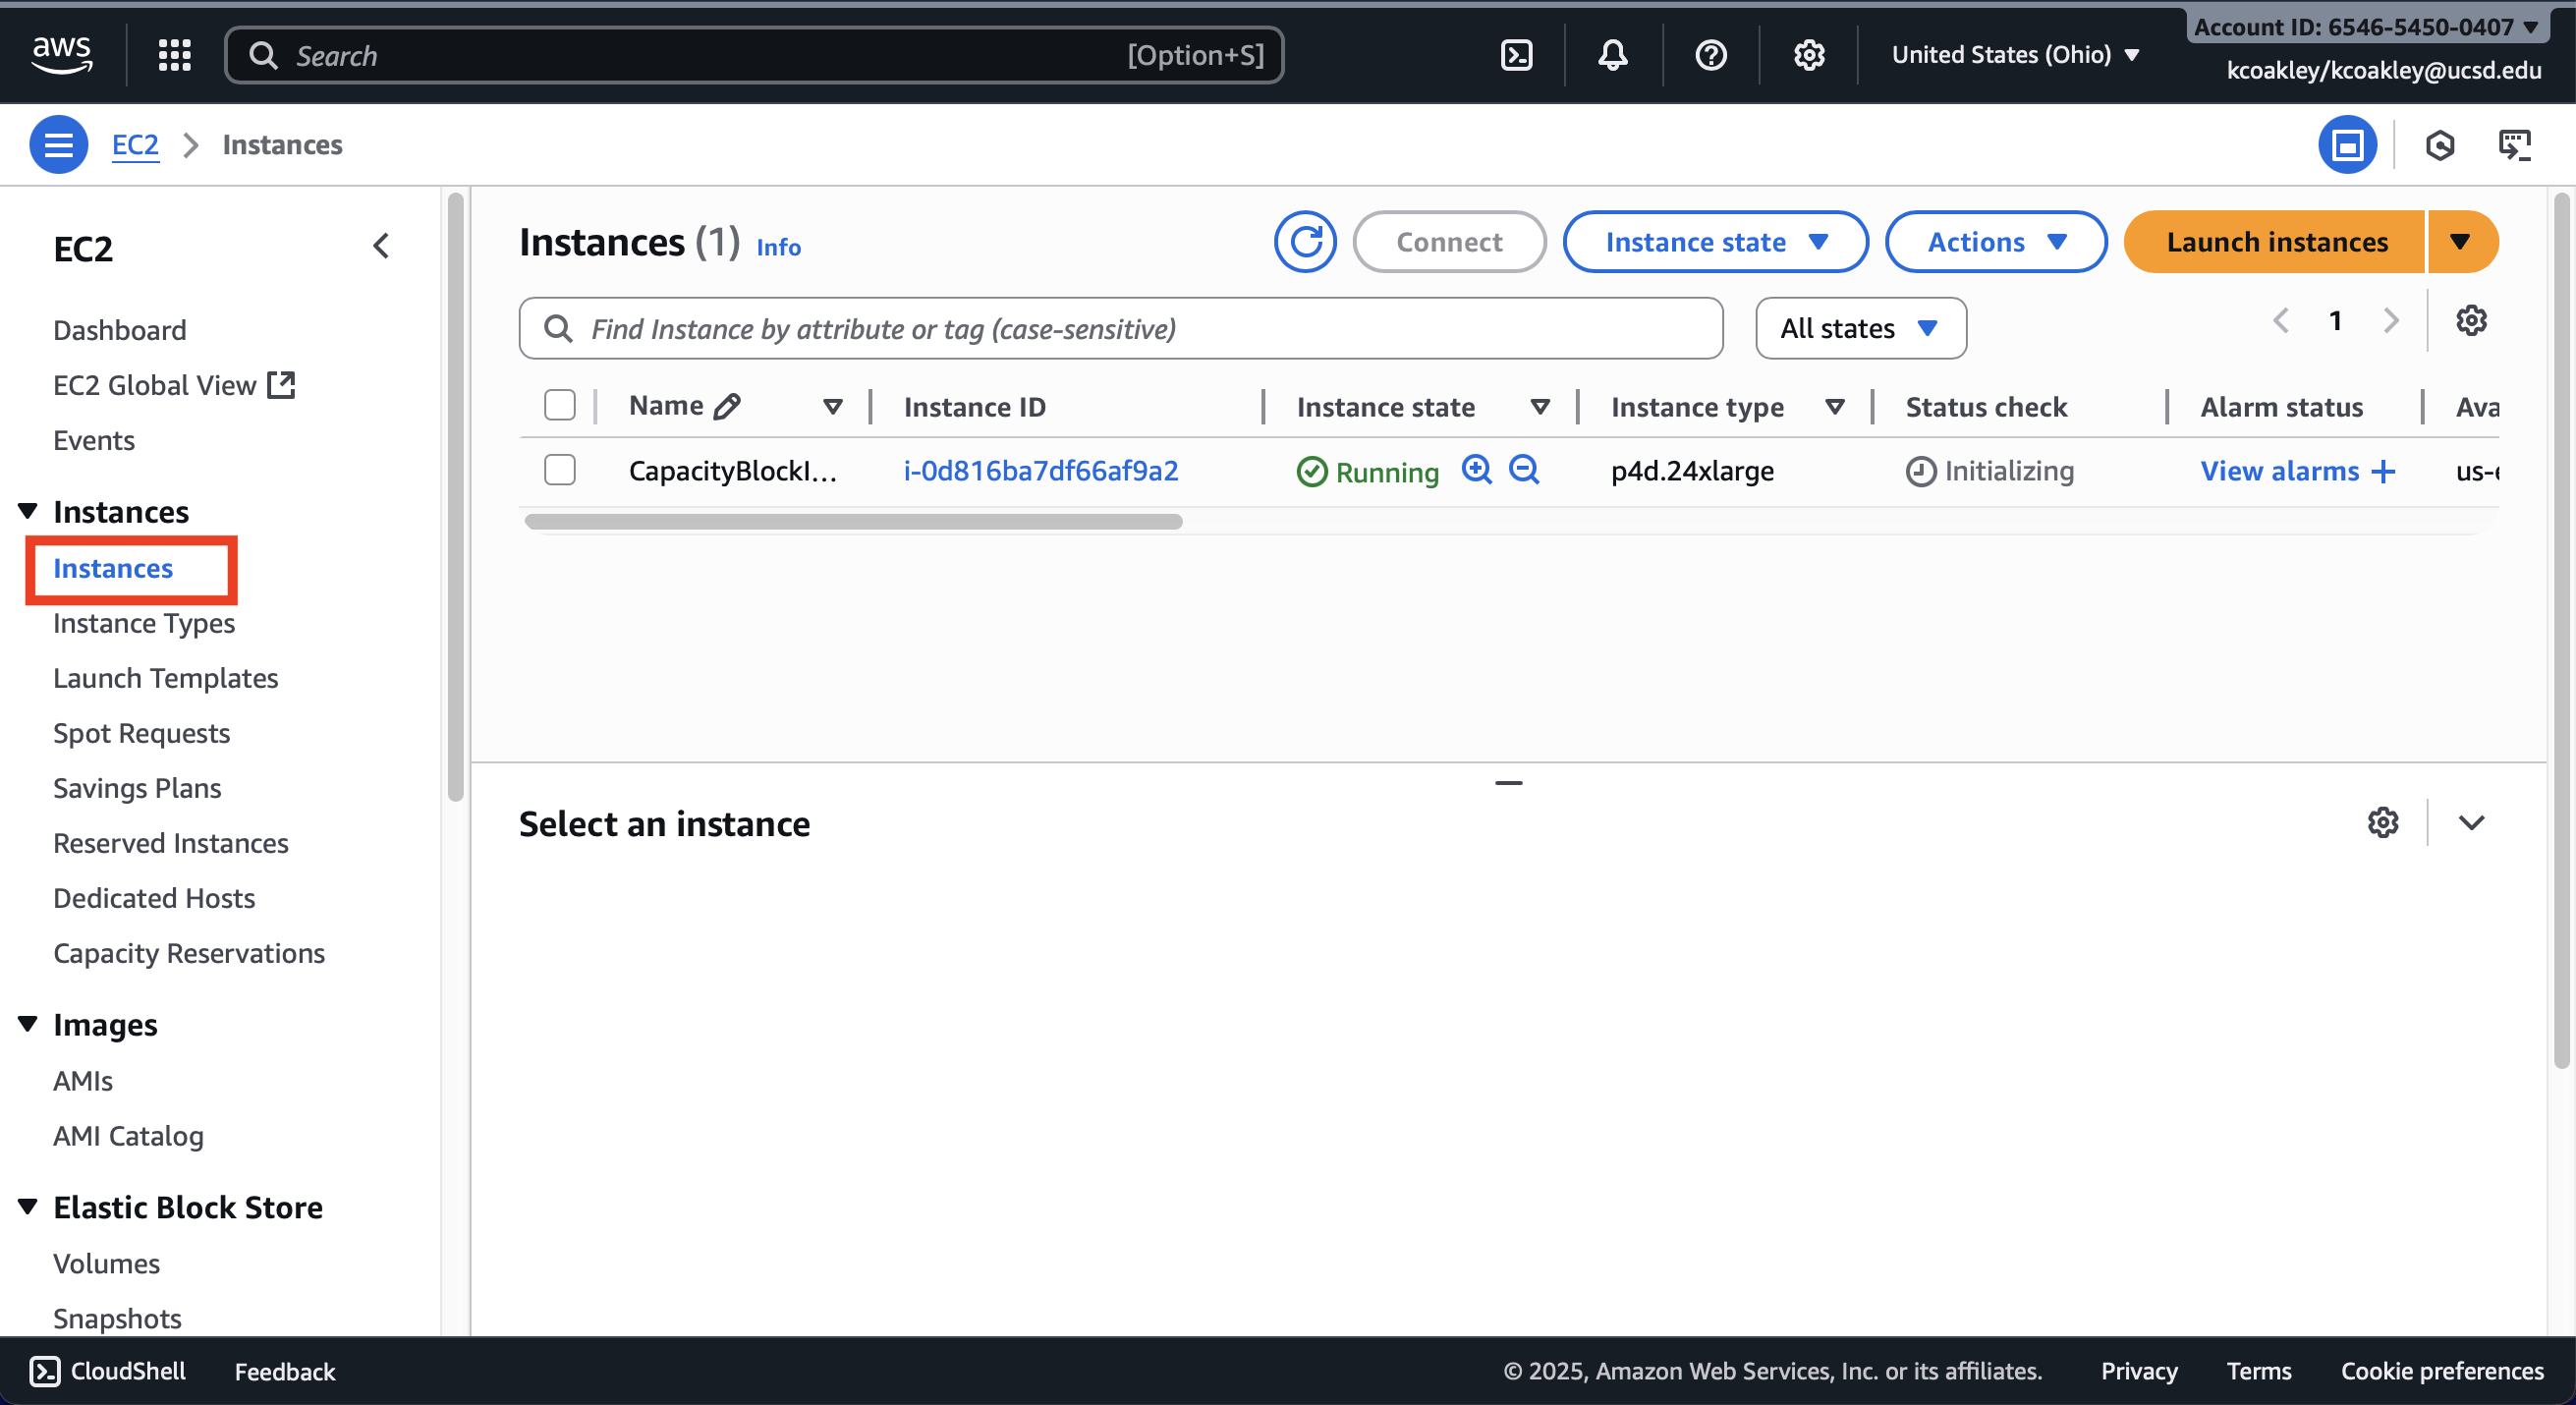
You should see confirmation that the instance was successfully launched.

The instance will be visible in the Instances list.
AWS will state that 0 instances are available if you go back to the Capacity Reservation menu.

Related Videos
“Capacity Blocks for ML” presented at a Cloudbank Zoom Workshop on August 14th, 2025 by Nick Okram from AWS
